
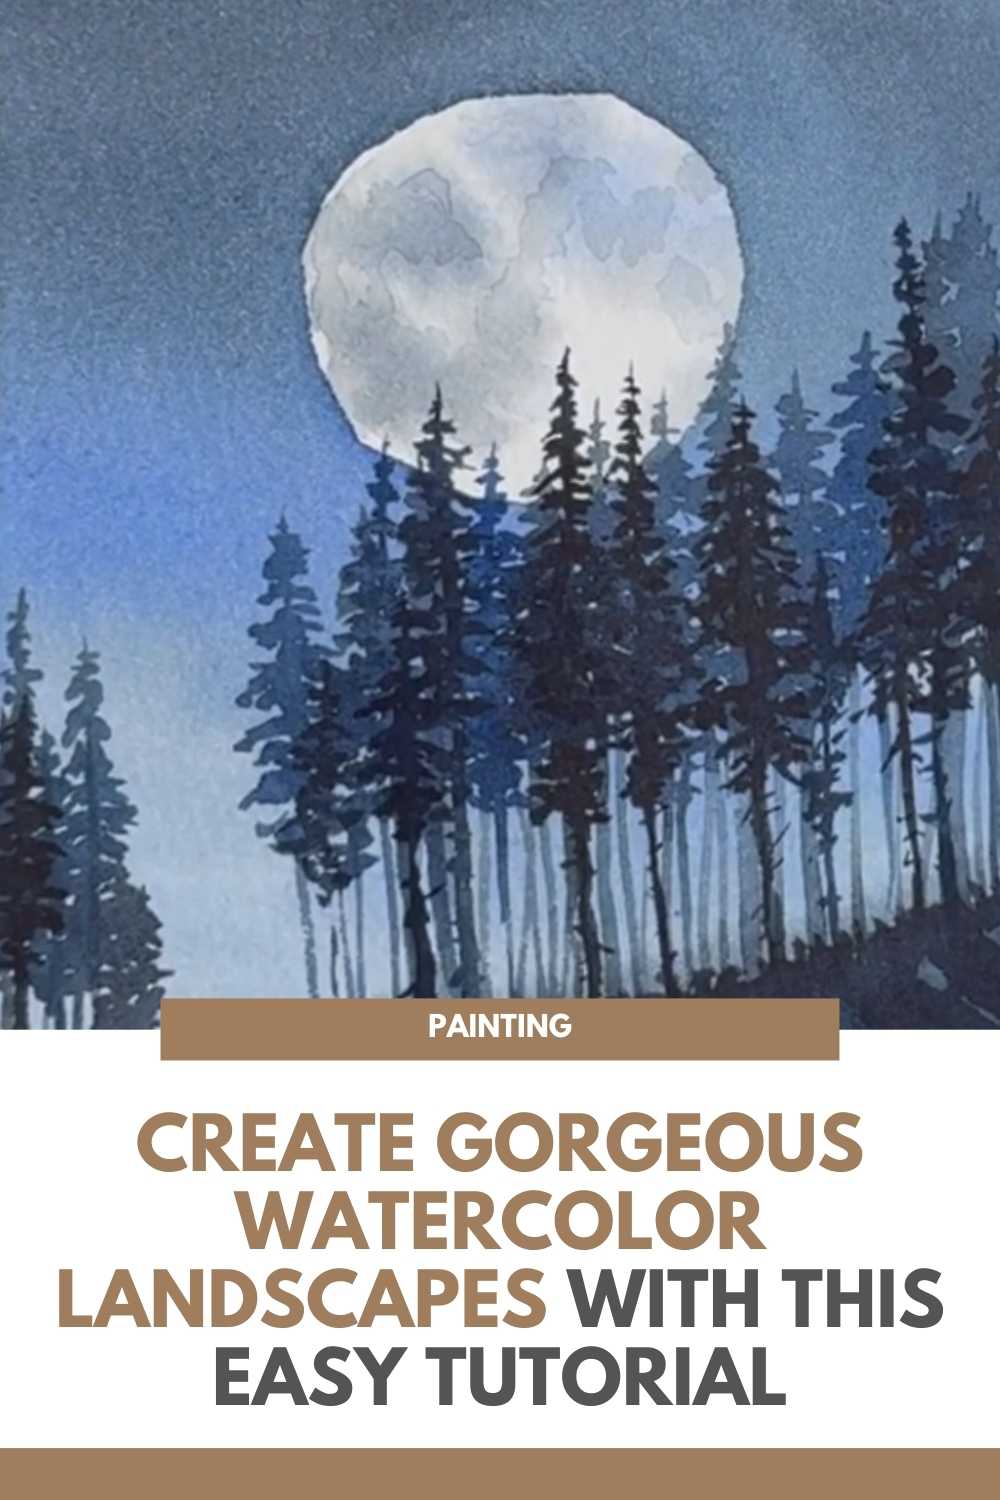
Create Gorgeous Watercolor Landscapes with This Easy Tutorial
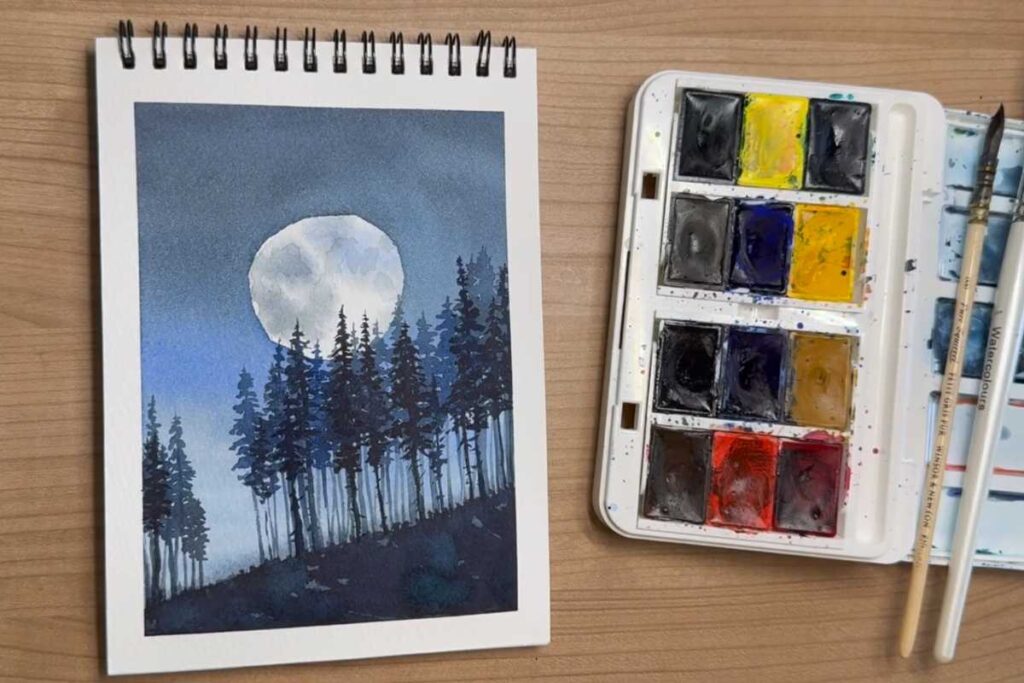
Creating a watercolor landscape can be a relaxing and rewarding experience, especially for beginners.
If you’ve always wanted to learn how to capture the beauty of nature using watercolors, this tutorial is the perfect starting point.
Whether you want to paint a serene sunset, a vast mountain range, or a simple forest scene, watercolor offers a wonderful medium to bring your artistic vision to life.
In this article, we will introduce you to the basics of painting a watercolor landscape.
This process can seem challenging at first, but with the right approach and some practice, you’ll be able to create beautiful, atmospheric landscapes that capture the essence of nature.
As you follow along, make sure to check out the video tutorial by Art In Motion, which demonstrates each step in detail.
Materials Needed
Before diving into the painting process, it’s important to have the right tools. You don’t need a lot of fancy equipment, but there are a few essentials that will make the process easier and more enjoyable. Here’s what you’ll need:
Watercolor paints: Choose a basic set of watercolors with a variety of colors. The more pigment options you have, the better.
Watercolor paper: A good quality, heavy-weight paper is essential for watercolors. This ensures that the paper can handle water without warping.
Brushes: A selection of watercolor brushes, including a flat brush for washes and a round brush for detail work, will help you achieve different effects.
Water container: You’ll need water to dilute your paints and clean your brushes.
Paper towel or sponge: For blotting excess water or paint.
These materials will serve as the foundation for your watercolor landscape painting.
Basic Steps in Painting a Watercolor Landscape
The process of painting a landscape in watercolor is broken down into several steps, from sketching your basic composition to adding the final touches.
While the video tutorial will guide you step-by-step through these techniques, here’s an overview of the process:
1. Sketching the Scene
Start by lightly sketching the basic shapes and outlines of your landscape. Use a pencil to create the major elements of the scene, such as the horizon line, trees, mountains, or buildings.
Keep the sketch light and loose, as this will serve as a guide for your watercolor layers.
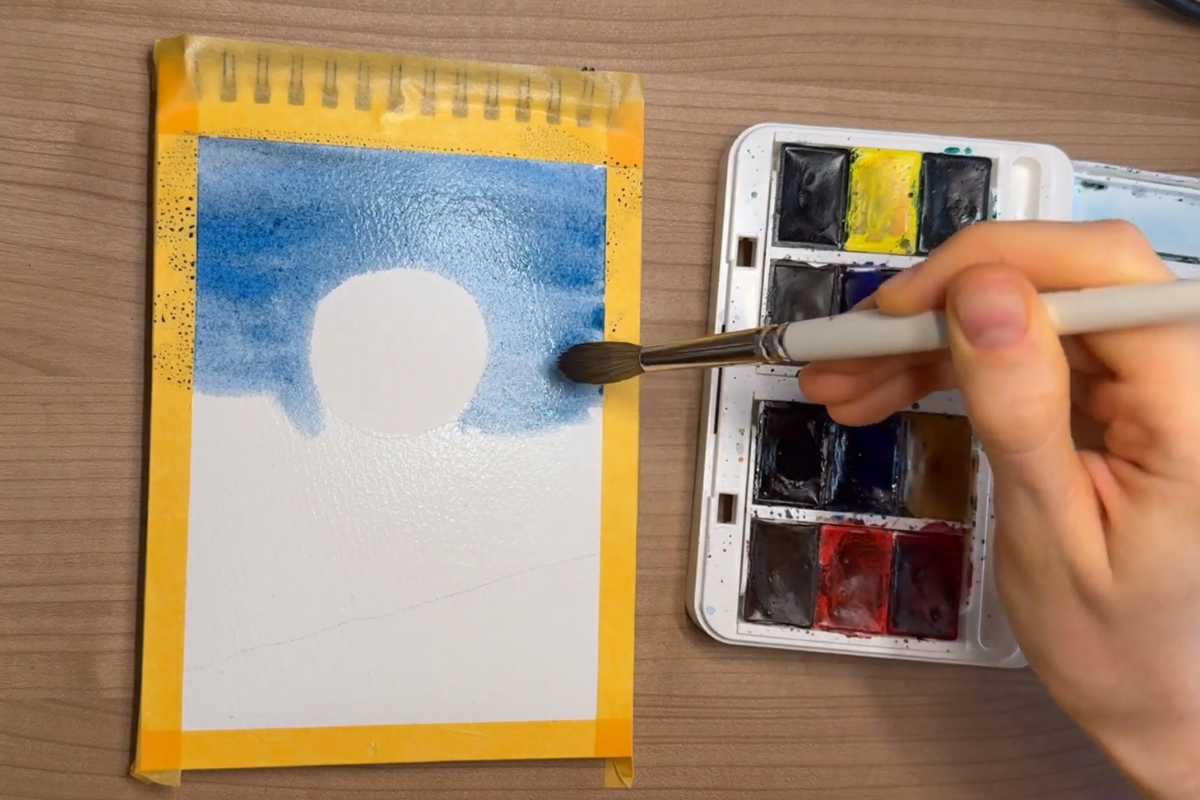
2. Adding the Sky and Background
Once your sketch is in place, it’s time to start painting the background. Using a wet-on-wet technique, apply a light wash of color to the sky.
This technique allows the paint to spread naturally, creating soft gradients that are perfect for skies. Choose light, transparent colors for the sky, and don’t forget to leave some white space for clouds or other details.
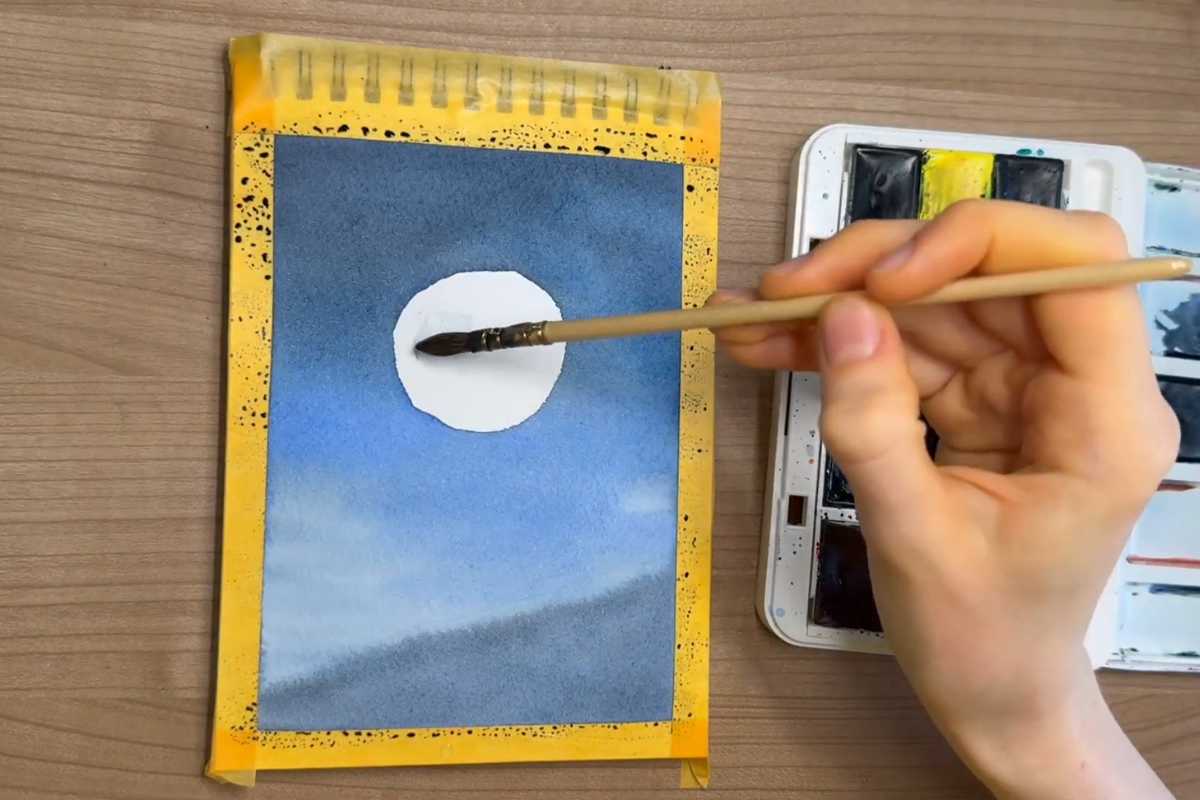
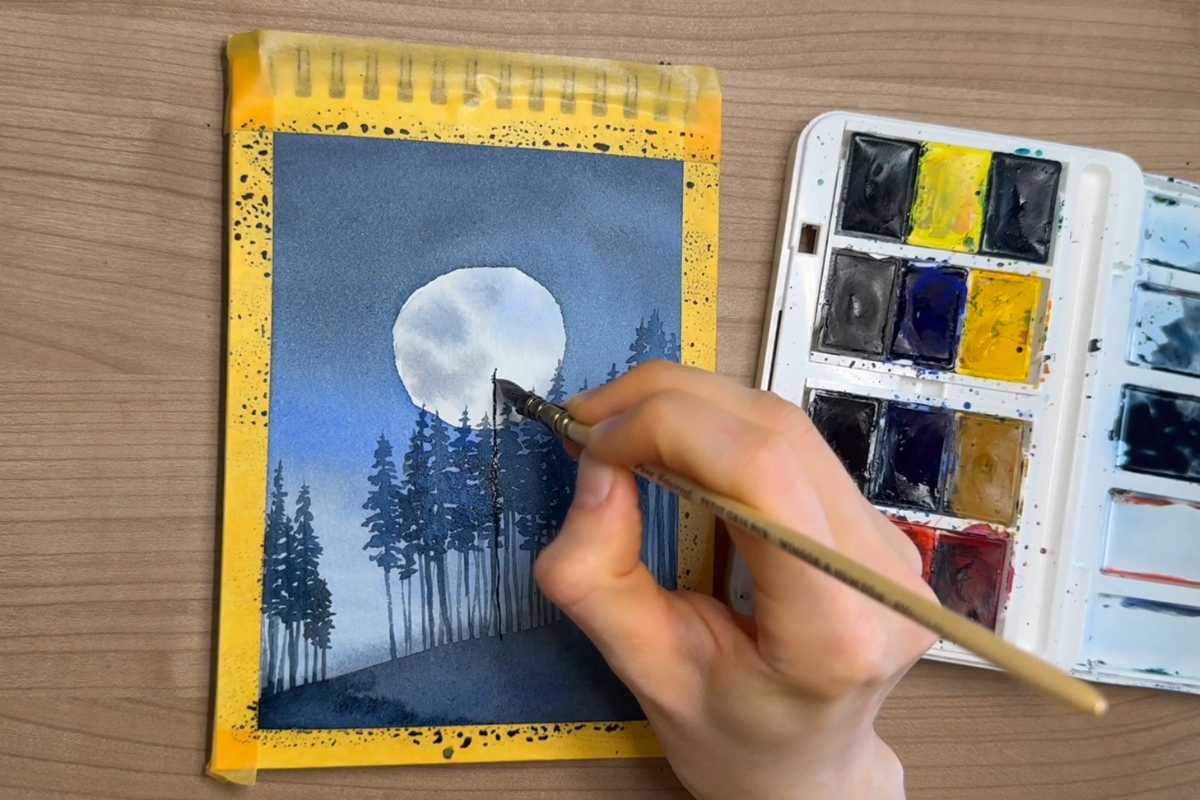
3. Painting the Foreground and Trees
Next, focus on the trees, mountains, or any other elements that are in the foreground. This is where the wet-on-dry technique comes into play.
Apply a more concentrated pigment to create deeper shadows and highlights. For the trees, use a dabbing motion with your brush to create the textured appearance of leaves or branches.
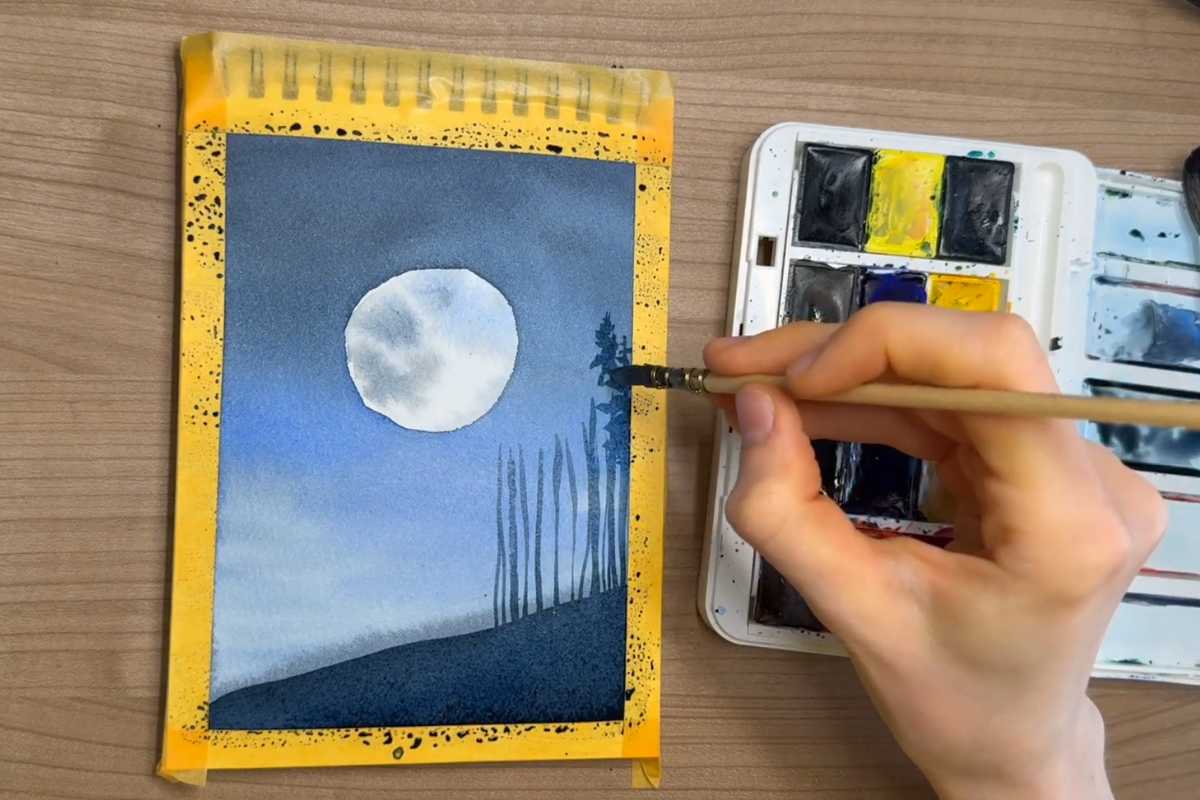
4. Detailing and Layering
Once the basic washes have dried, you can start adding more details to your landscape. Use smaller brushes for intricate details, such as the texture of bark on trees, distant mountains, or grass in the foreground.
This step is where you can really bring your painting to life by adding depth and dimension.
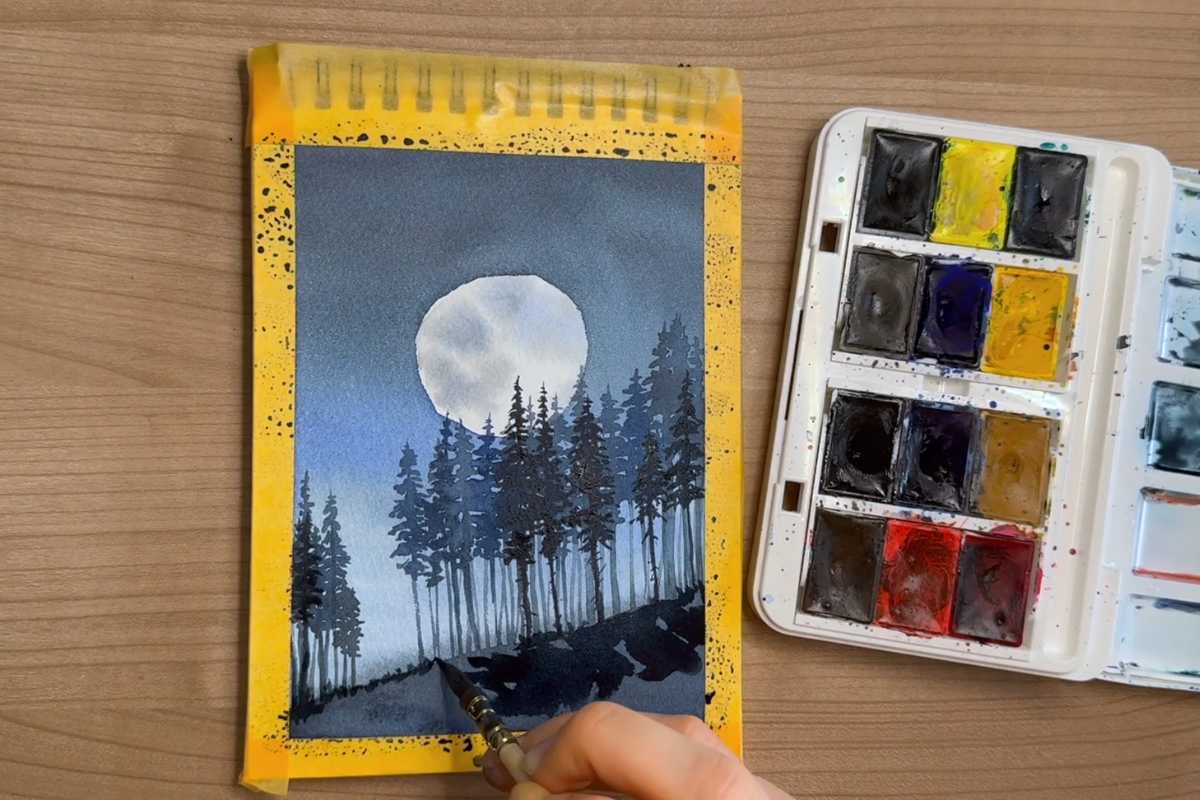
5. Final Touches
After the main elements are painted, take a step back and evaluate your work. Add any final touches to enhance the light and shadow in your landscape.
You can use a fine brush to add small details like reflections in water, highlights on tree leaves, or additional cloud formations.
Common Challenges and Tips for Beginners
As a beginner, you may face some challenges while painting landscapes. However, don’t be discouraged! It takes time to master watercolors, and practice is key. Here are a few tips to help you along the way:
Practice color mixing: Experiment with blending different colors to create a variety of shades and tones. Watercolors are all about layering and building up color.
Control the water: Be mindful of the amount of water you use in your paints. Too much water can make your colors too light, while too little water can cause streaks and uneven washes.
Don’t rush: Watercolor painting is all about patience. Allow each layer to dry before adding more details or layers.
Conclusion
Painting landscapes with watercolors is a relaxing and fulfilling way to express your creativity.
By following the steps outlined in this article, and watching the Art In Motion video tutorial, you’ll be able to create your own beautiful watercolor scenes.
Remember to practice, experiment with colors, and most importantly, enjoy the process. Happy painting!
We thank Art In Motion for the images.
Enjoy The Video Tutorial

Source: Art In Motion
Did you find this post useful or inspiring? Save THIS PIN to your Art Board on Pinterest! 😊
Last update on 2025-12-25 / Affiliate links / Images from Amazon Product Advertising API
Discover More Artistic Inspiration