
Create Luminous Woodland Mushrooms with Easy Watercolor Techniques

Add a little wonder to your sketchbook with a luminous watercolor forest dotted by charming red-capped fungi.
In the accompanying video tutorial by Creative Lass, you’ll see how gentle washes, soft edges, and crisp highlights come together to build a scene that feels both dreamy and grounded.
Below, you’ll find an artist’s overview—no step-by-step—so you can paint with confidence, understand the key ideas, and enjoy the process from first splash to final sparkle.
Why Mushrooms Make Enchanting Subjects
Forest mushrooms offer the perfect balance of structure and whimsy. Their rounded caps and slender stems read clearly from a distance, while speckles, gills, and ringlets invite close-up attention.
A vibrant mushroom painting instantly becomes a focal point, surrounded by blurred trees, misty light, and earthy textures that showcase watercolor’s natural glow.
Tell a Color Story
Lean into a woodland palette that mixes fresh greens, earthy browns, and warm reds. The poppy caps sing against a background of moss and bark.
Use complementary contrast—green against red—to make the fungi shine, and let soft yellow undertones create a believable forest haze.
Compose for Depth and Wonder
Place one larger mushroom forward and a smaller one slightly behind. Overlapping silhouettes and soft vertical tree shapes pull the eye into the scene.
Curving branches at the top frame the composition like a theater curtain, guiding attention to the stars of the painting.
Materials and Setup
Any good cotton watercolor paper will reward you with clean lifts and glowing washes. A small assortment of round brushes plus one flat is enough.
Choose transparent pigments that bloom beautifully—think quinacridone reds, sap green, raw umber, and a touch of indigo for depth.
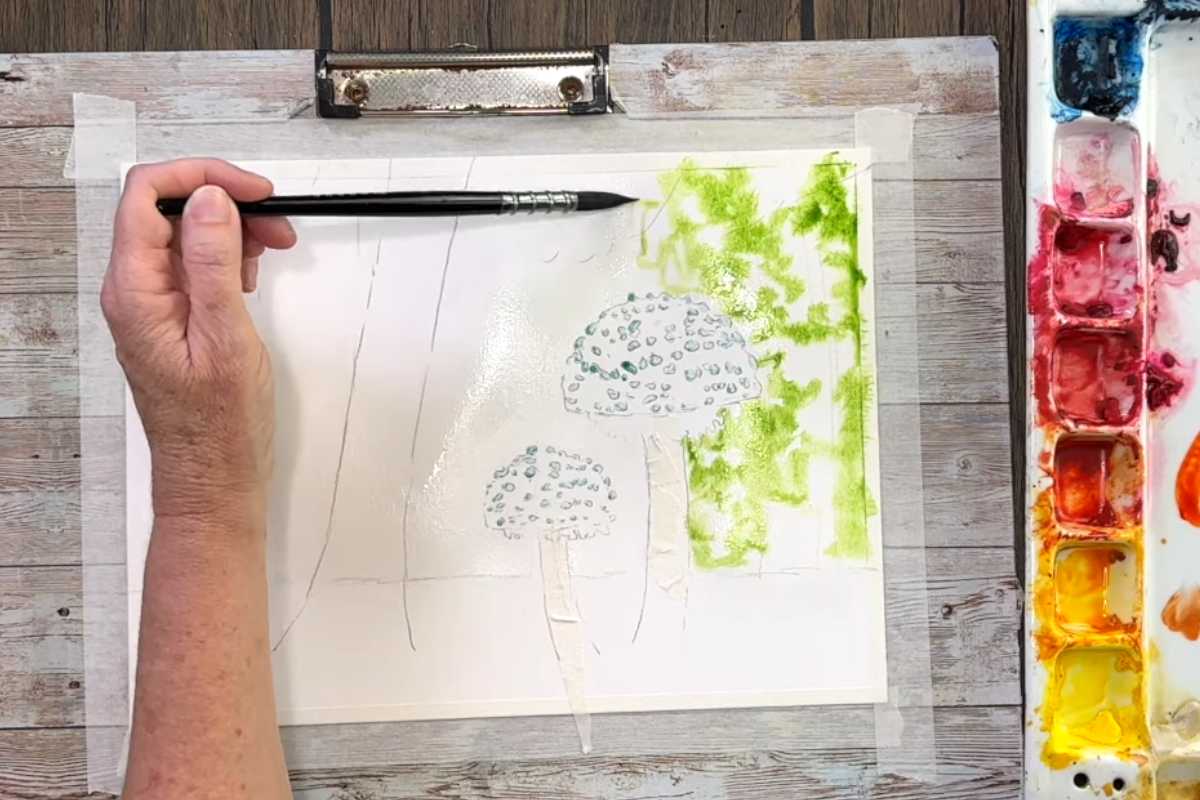
Keep a tissue handy for lifting highlights and a white gouache or opaque watercolor for the signature mushroom spots.
Techniques You’ll Practice
The Wet-on-Wet Glow
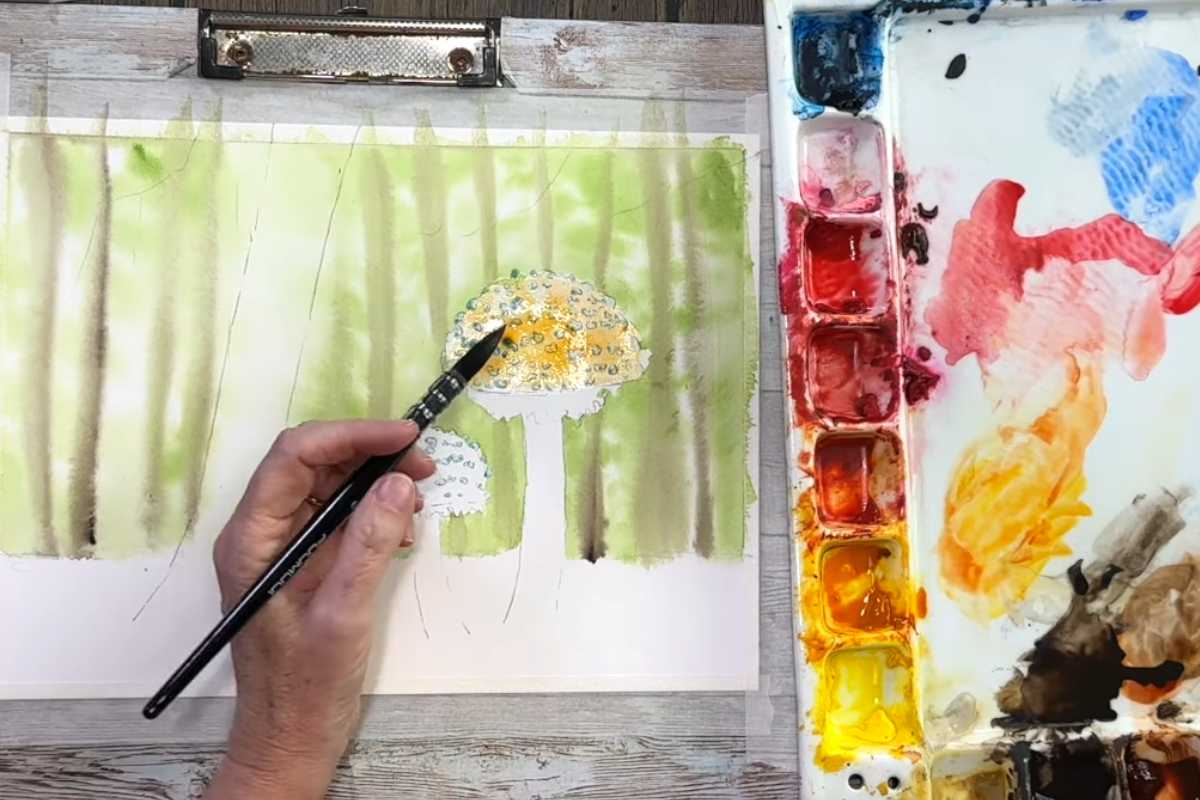
For the dreamy backdrop, wet-on-wet lets colors merge into soft, leafy gradients. Drop diluted greens into a damp surface and allow them to drift.
While still moist, lift gentle shafts of light with a clean brush to suggest sun filtering through tall trunks. This gives your watercolor forest its magical atmosphere without heavy detail.
Texture that Feels Like Bark and Soil
Use granulating browns, light splattering, and dry brush across rough paper to hint at bark, moss, and forest floor.
Imperfection is your friend; organic variation reads as nature. Fade textures as they recede to keep your mushrooms in the limelight.
Color Transitions on the Caps
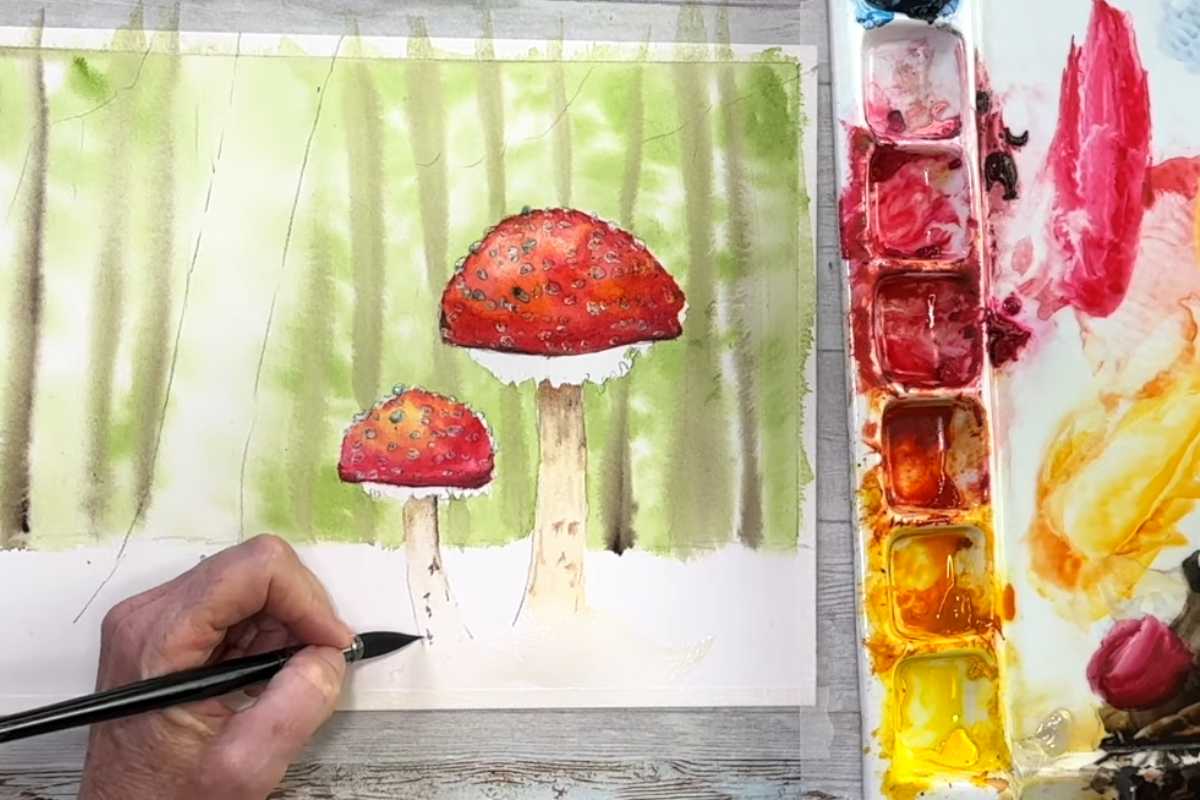
Build the caps from warm golds into saturated crimson, then deepen the shadowed underside with cool reds and a whisper of indigo.
The smooth transition communicates curvature. Preserve or lift a rim of light along the cap edge to make it look sunlit and dimensional.
Edges that Work for You
Keep background edges soft and mushrooms crisp. This soft-versus-hard contrast is a simple way to create depth and guide the viewer’s eye.
Where two shapes touch, vary the edge—sharp in focal areas, feathery elsewhere—to avoid stiffness.
Finishing Touches that Sparkle

Once the washes are dry, dot the caps with opaque white for those iconic speckles. A few delicate grasses at the base and subtle cast shadows anchor the stems.
Consider a final mist of diluted green behind the caps to push them forward—a quick atmospheric adjustment that feels like magic.
Troubleshooting and Friendly Tips
If your red caps look dull, glaze a transparent warm red to revive them.
Streaky backgrounds? Re-wet selectively and smooth transitions with a clean damp brush.
Overworked details can be softened with gentle lifts; add fresh texture on top once dry.
Remember, layering is lighter than you think—sneak up on the darkest darks in two or three passes.
What You’ll Gain

Beyond a charming painting, you’ll practice controlled washes, negative painting around highlights, and confident edge control—the core skills that make watercolor feel effortless.
Most of all, you’ll walk away with a scene that radiates story: sunlight sliding through trees, quiet air, and two proud mushrooms holding the stage.
For the full demonstration, watch the video by Creative Lass, then brew a cup of tea, tape down your paper, and let the forest bloom on your page. Paint for joy, not perfection—and the magic will follow.
We thank Creative Lass for the images.
Enjoy The Video Tutorial

Source: Creative Lass
Did you find this post useful or inspiring? Save THIS PIN to your Art Board on Pinterest! 😊

Last update on 2026-01-14 / Affiliate links / Images from Amazon Product Advertising API
Discover More Artistic Inspiration