
Easy Gouache Tutorial: Painting Strawberries in a Box

Today we want to share with you a special post:
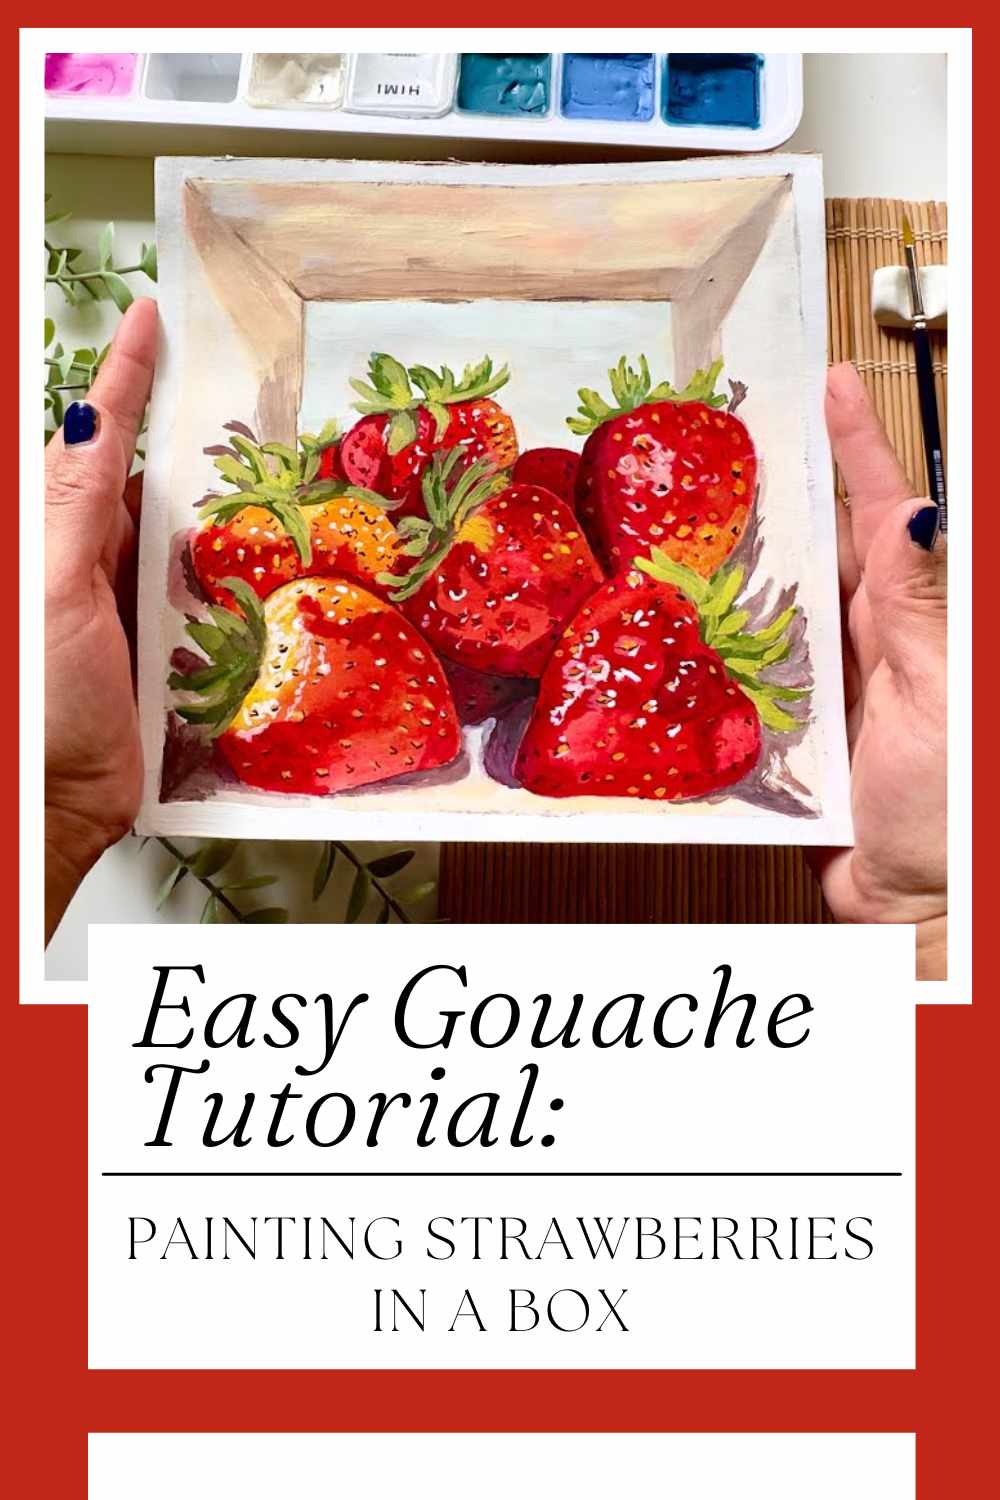
Painting Strawberries in a Box
Creating vibrant and lifelike paintings can be incredibly satisfying, and with gouache, it’s both fun and accessible. Today, we’re going to explore an easy painting of strawberries in the box with gouache.
This tutorial, shared by the talented Bihter Sancaktar, guides us through the process step by step. Whether you’re a beginner or an experienced artist, you’ll find this project enjoyable and rewarding.
Getting Started with Gouache
Gouache is a versatile medium that combines the best qualities of watercolor and acrylic. It’s opaque, allowing for rich, vibrant colors, and it can be reactivated with water, making it forgiving for beginners. For this project, we’ll need a few basic supplies:
- Gouache paints
- Watercolor paper or a mixed media sketchbook
- Brushes (a variety of sizes)
- Palette
- Water container
- Paper towels
Setting Up Your Painting
Before we dive into painting, it’s important to set up our workspace. Ensure you have all your materials within reach, and find a comfortable spot with good lighting.
Begin by sketching the outline of the strawberries in the box. Keep the sketch light and simple, as it will serve as a guide for your painting.
Applying the Base Colors
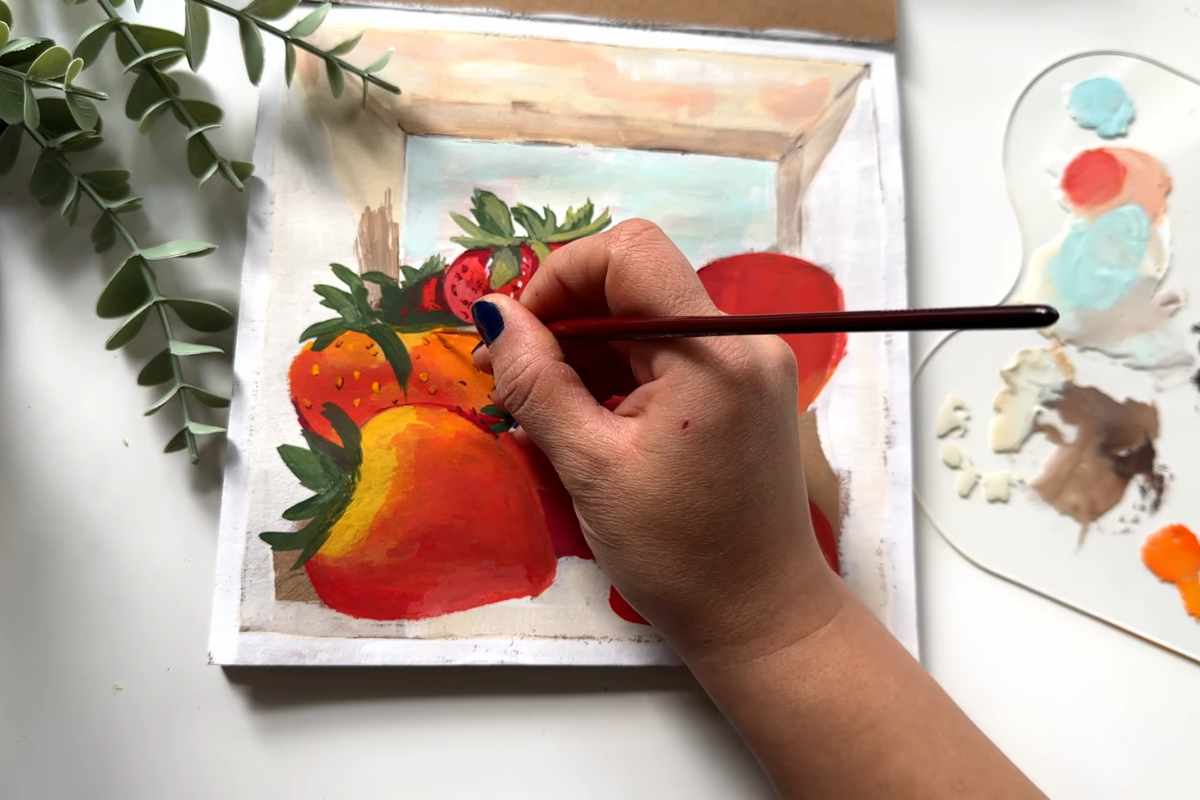
Start by applying the base colors to your strawberries. Use a medium-sized brush to fill in the strawberries with a vibrant red. Gouache allows you to layer colors, so don’t worry if the initial layer isn’t perfect.
We can add more depth and detail as we go. For the box, choose a contrasting color that complements the strawberries. Light brown or beige can work well for a rustic look.
Adding Depth and Shadows
Once the base colors are dry, it’s time to add depth and shadows. Mix a slightly darker shade of red and apply it to the areas of the strawberries where shadows naturally fall.
This will give your strawberries a three-dimensional appearance. Use a similar technique for the box, adding darker shades to the sides and bottom to create the illusion of depth.
Highlighting the Details
Now, let’s bring our strawberries to life with some highlights and details. Mix a lighter shade of red or even a touch of white and apply it to the areas where light naturally hits the strawberries.
This will make them look juicy and fresh. For the seeds, use a fine brush to add small dots of white or yellow. These little details make a big difference in the realism of your painting.
Finishing Touches
To complete your painting, add any final touches that enhance the overall look. This might include more highlights, refining the edges, or adding a background color.
Sometimes a simple wash of light green or blue can make the strawberries pop even more. Don’t forget to step back and look at your painting from a distance to see how it all comes together.
Sealing Your Artwork
Once your painting is dry, consider sealing it with a spray varnish to protect the colors and ensure its longevity. This step is optional but can add a professional touch to your artwork.
Conclusion
Painting strawberries in a box with gouache is a delightful and easy project that allows you to explore the versatility of this medium. By following the steps in the tutorial by Bihter Sancaktar, you can create a beautiful and vibrant painting that showcases your creativity. Remember, the key to a successful gouache painting is layering, patience, and enjoying the process.
Don’t forget to watch the video tutorial by Bihter Sancaktar for a detailed guide and additional tips. Whether you’re painting for fun or to improve your skills, this project is a fantastic way to explore the world of gouache painting. Happy painting!
We thank Bihter Sancaktar for the images.
Enjoy This Video Tutorial About Painting Strawberries in a Box
Source: Bihter Sancaktar
Did you find this post useful or inspiring? Save THIS PIN to your Art Board on Pinterest! 😊
Discover More Artistic Inspiration