
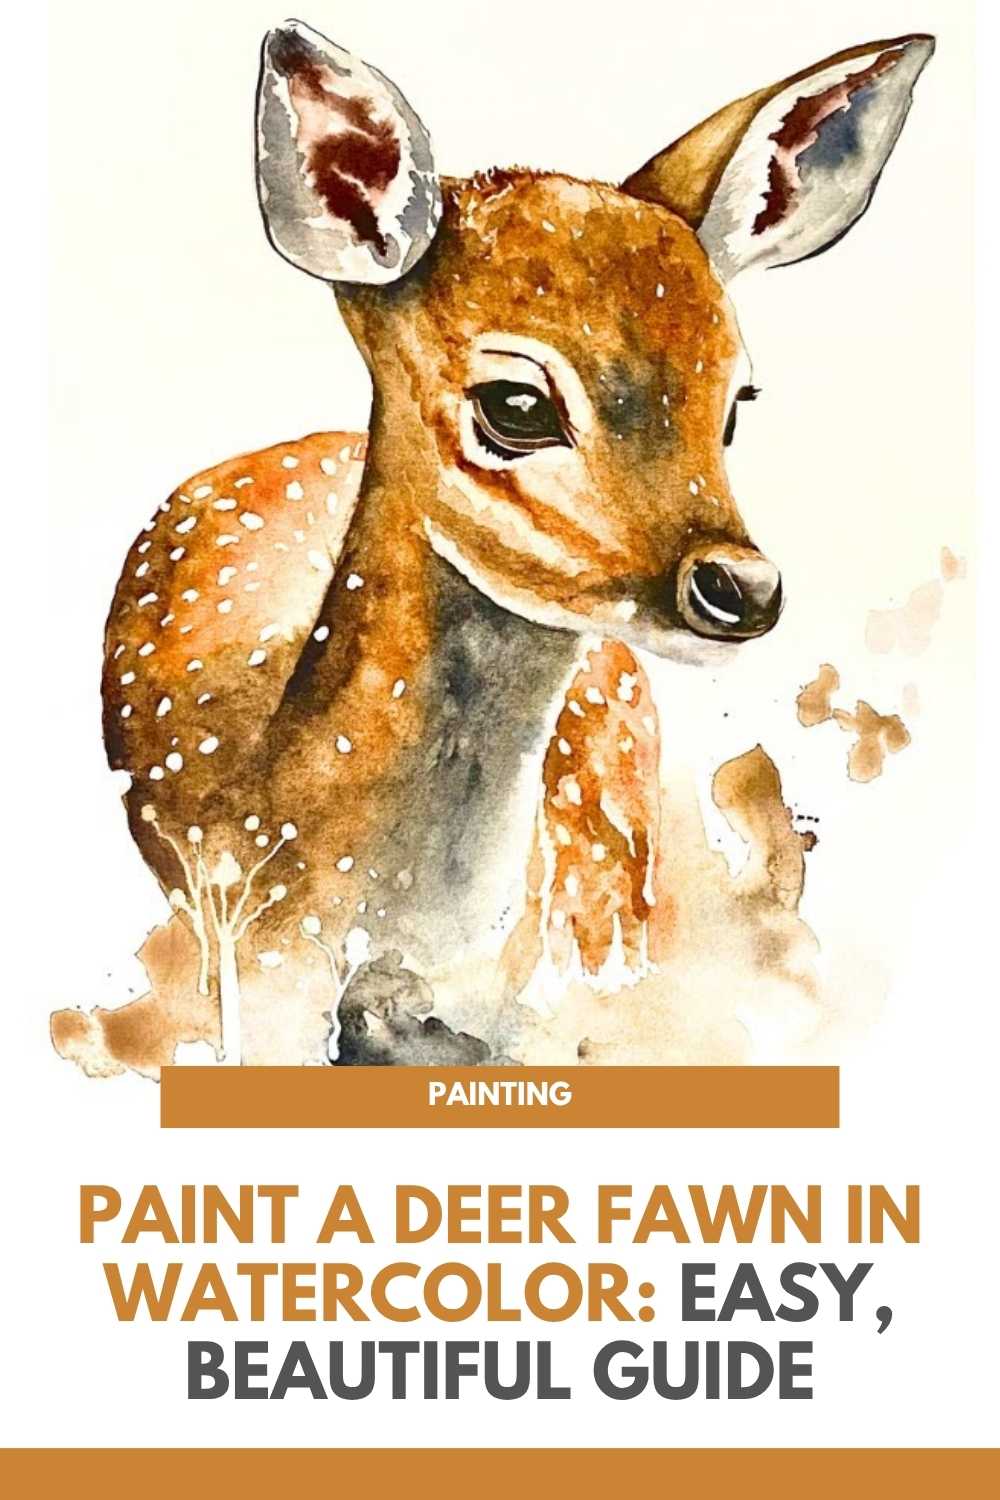
Paint a Deer Fawn in Watercolor: Easy, Beautiful Guide

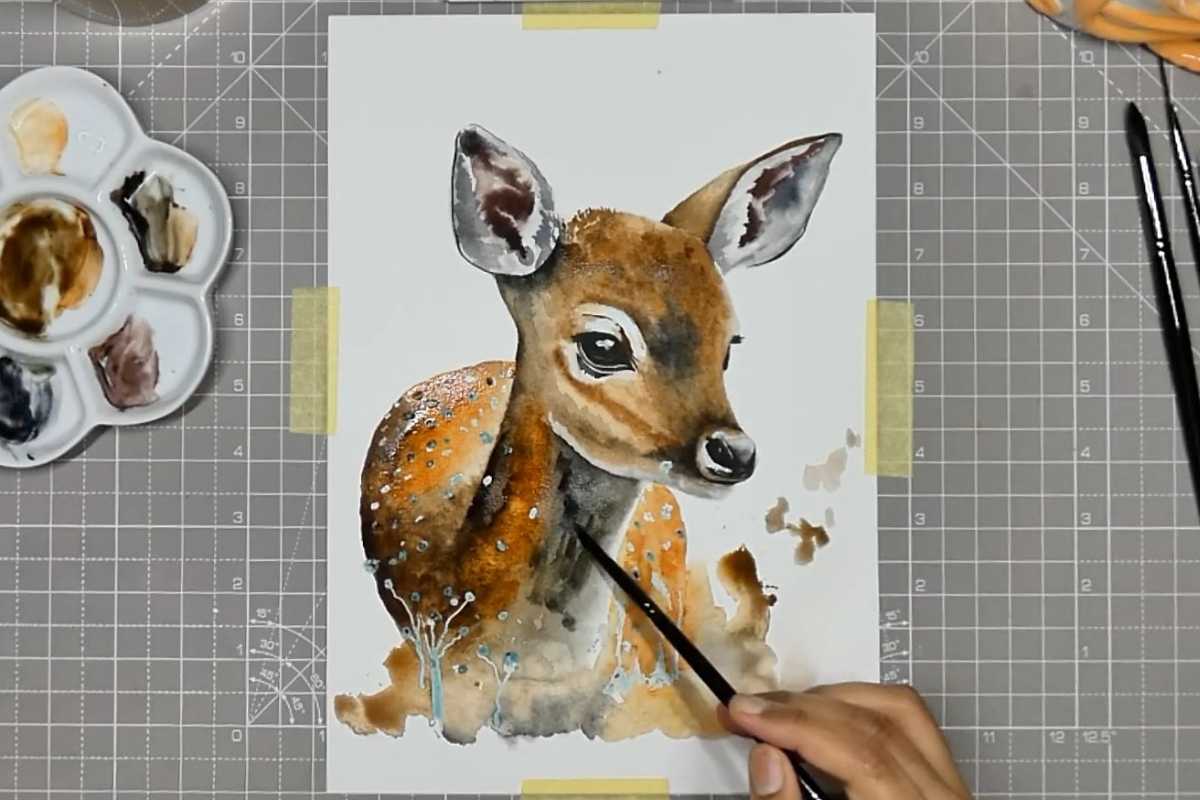
Paint a tender fawn in watercolor with confidence. In the video tutorial shared here by Canvas Whispererr, you’ll see the full process unfold in real time, from the first pale wash to the final luminous accents.
Below you’ll find guidance on materials, color choices, and artistic decisions that give this subject warmth and life—without duplicating the step-by-step demonstrated in the video.
Why This Subject Shines in Watercolor
A fawn’s features—soft transitions, natural textures, and delicate light—play perfectly to watercolor’s strengths.
Transparent layers build believable fur, while controlled blooms and lifted highlights suggest the sparkle of white spots and the glisten in the eyes. The result is a painting that feels airy, emotive, and alive.
Materials & Palette Notes
Paper: 100% cotton, cold-press, 300 gsm for resilient washes and clean lifting
Brushes: a large round for washes, a medium round for forms, and a fine liner for eyelashes and whiskers
Palette: Winsor & Newton Cotman earths—Burnt Sienna, Raw Umber, Burnt Umber—with Payne’s Gray, Neutral Tint, a touch of Ultramarine and Alizarin for subtle violets, plus Titanium White gouache (optional) for final sparkles
Keep mixes simple. Limited, harmonious colors help maintain unity across fur, ears, and background.
Core Painting Ideas (Without the Step-by-Step)
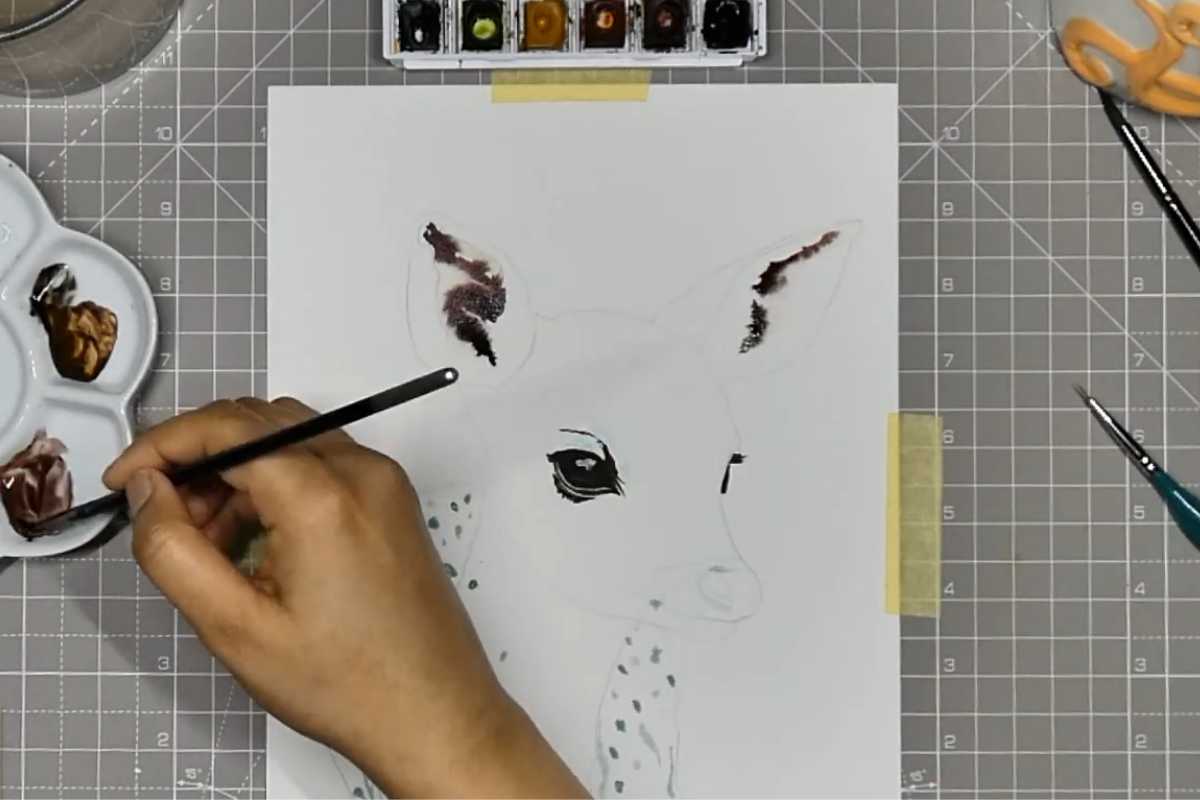
Eyes & Expression
The eyes are the emotional focal point. Aim for a clean oval shape, a deep value in the iris, and a crisp highlight preserved or lifted.
A soft, darker rim sets the eye into the socket; a faint reflection line suggests moisture and gentle curiosity.
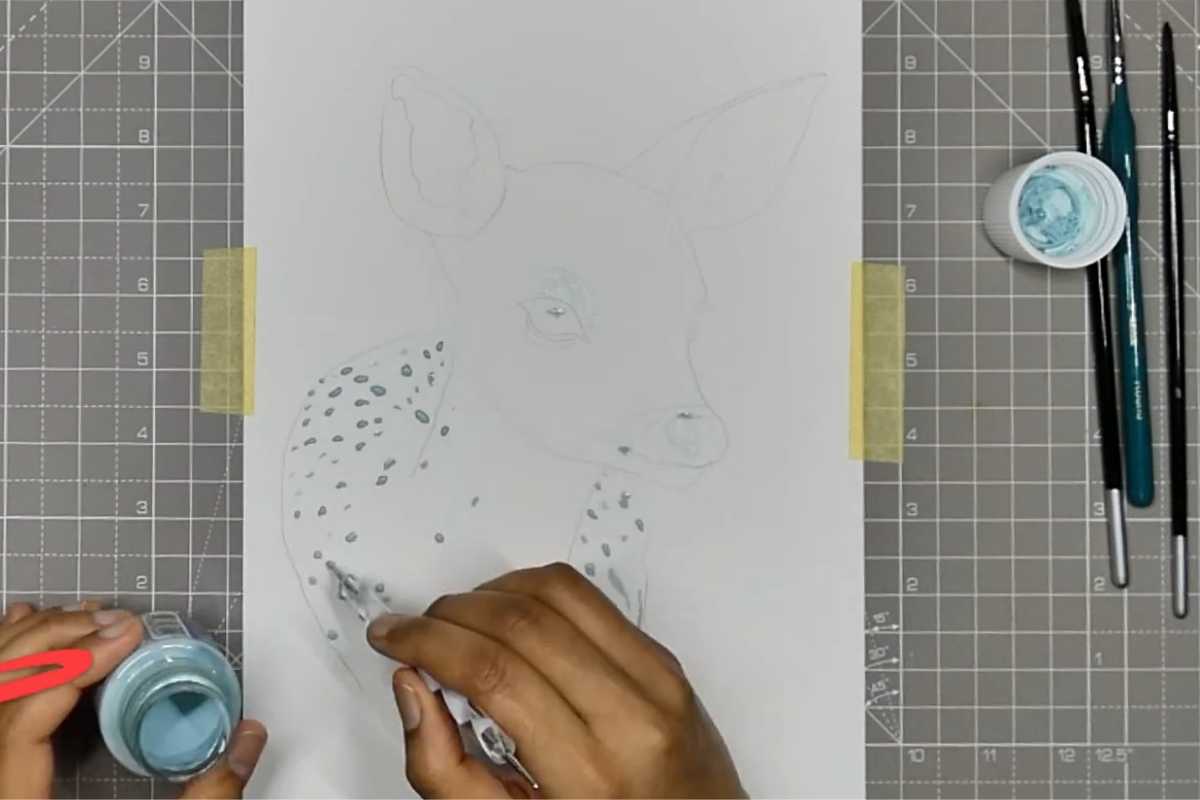
Fur, Spots, and Form
Think values first, textures second. Establish the light direction with transparent mid-tones of Burnt Sienna and Raw Umber. Build shadow planes with cooler neutrals (Payne’s Gray plus a touch of Ultramarine).
Keep strokes with the direction of fur; switch between wet-in-wet for softness and drybrush for velvety texture. Preserve or lift the white spots along the back and forehead to retain that tender, youthful look.
Ears & Edges
The ears carry subtle violets and grays—muted purples from Ultramarine + Alizarin + a touch of Umber.
Let inner-ear shadows stay soft near the base and sharpen slightly toward the rim. Varied edges—lost in the light, found in the shadow—create believability without over-detailing.
Background & Atmosphere
Keep the environment loose and impressionistic so the portrait stays dominant. Dilute earth greens and neutral grays to suggest leaves and forest floor.
Encourage controlled blooms near the lower edge; they echo moss and soft debris without pulling focus. A few upward flicks imply grasses, while negative painting around whiskers and ear tips maintains clarity.
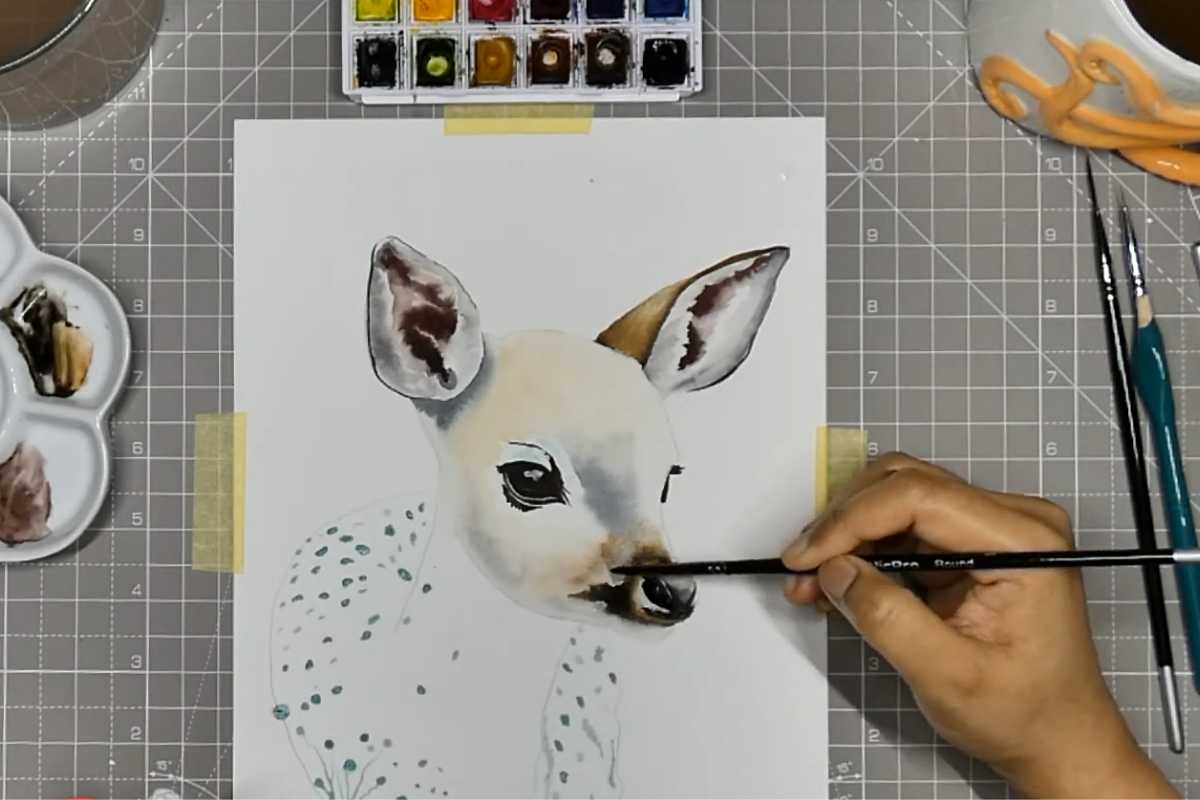
Color & Value Tips
Use warm siennas for sun-kissed areas and cooler grays in shadow to create natural temperature shifts.
Reserve your deepest values for the eyes, nostril, and the shadow under the lower jaw—this anchors the face.
If a wash dries chalky, re-wet and glaze with a transparent mix to restore richness.
Common Pitfalls (and Quick Fixes)
Muddy fur: Too many passes. Let layers dry fully and mix on the palette, not on the paper.
Over-hard edges: Feather with a damp, clean brush while the paint is still workable.
Flat expression: Deepen the cast shadow under the brow ridge and add a micro-highlight to the pupil for life.
Harsh white spots: Soften the lower edge of a few spots with a damp touch to integrate them into the coat.
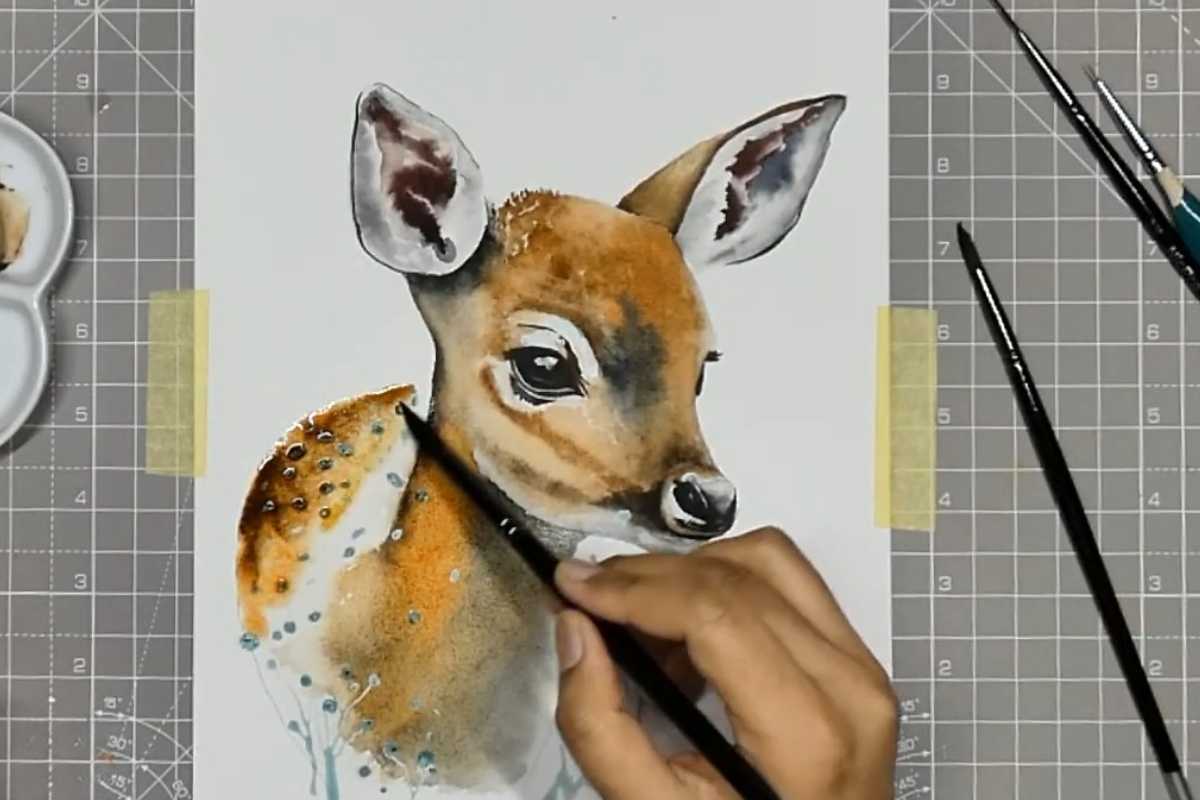
Finishing Touches
Keep final accents small but decisive: a pinpoint highlight in each eye, a few crisp whiskers, and a subtle reflected light along the muzzle.
Step back and squint—if the fawn’s silhouette reads clearly and the gaze feels alive, your values are working.
Paint With Ease and Joy
This gentle wildlife portrait is an ideal project for practicing transparent layering, edge control, and restrained color.
Watch the real-time demonstration by Canvas Whispererr, then make it your own—shift the background hue, vary the spot pattern, or tilt the head for a new mood.
With soft washes, thoughtful values, and a light touch, you’ll capture the quiet wonder of the forest on paper.
We thank Canvas Whispererr for the images.
Enjoy The Video Tutorial

Source: Canvas Whispererr
Did you find this post useful or inspiring? Save THIS PIN to your Art Board on Pinterest!
Last update on 2026-01-14 / Affiliate links / Images from Amazon Product Advertising API
Discover More Artistic Inspiration