
Paint a Vibrant Forest Woodland Walk with Gouache: A Beginner's Guide

Today we want to share with you a special post:
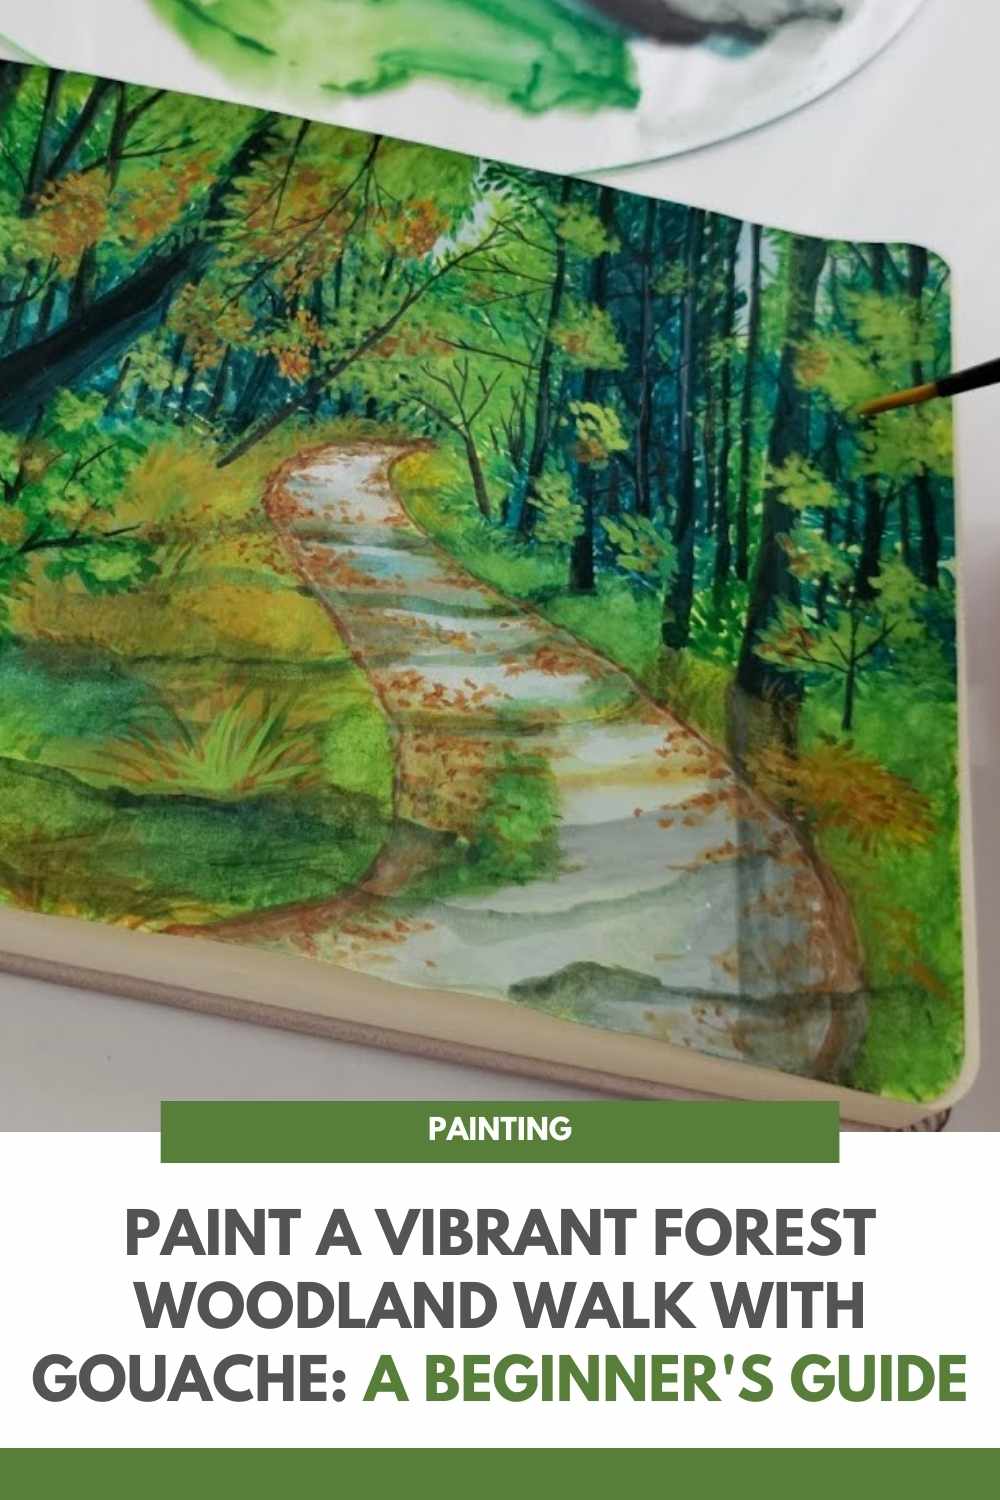
How to Paint a Green Forest with Gouache
If you've ever dreamed of capturing the serene beauty of a green forest woodland walk with gouache paint, then you're in for a treat.
In this Gouache Landscape Painting Tutorial, we'll explore the steps to create a stunning forest scene using gouache, guided by the talented artist Raghad.
This tutorial is perfect for both beginners and experienced artists looking to enhance their skills. Let's dive into the enchanting world of forest gouache painting and bring the lush greenery to life on our canvas.
Materials Needed
Before we start, let's gather our materials. For this project, we’ll need:
- Gouache paints (various shades of green, brown, and blue)
- Watercolor paper or a sturdy mixed-media paper
- Brushes (round and flat brushes in various sizes)
- Palette for mixing colors
- Water jar for cleaning brushes
- Paper towels or a cloth for dabbing brushes
Having the right tools can make a big difference in achieving the desired effects in your gouache landscape painting.

Step-by-Step Forest Gouache Painting
1. Preparing the Canvas: Begin by lightly sketching the basic outline of your forest scene on the paper. Focus on the major elements like the path, trees, and background foliage. This will serve as your guide as you apply the paint.
2. Laying the Background: Start with the background. Mix a light blue with a touch of white to create the sky. Apply it smoothly across the top part of your paper. Gradually blend in some light green and yellow tones as you move downward, representing the distant foliage.
3. Painting the Trees: Using darker shades of green and brown, start painting the trees. Focus on the trunks first, using vertical strokes with a flat brush. For the foliage, switch to a round brush and use a stippling technique to create the texture of leaves. Vary the shades of green to add depth and realism to the forest.
4. Adding Details: Now it’s time to add details that bring the forest to life. Use a smaller brush to paint the branches and finer details on the tree trunks. Mix different greens and browns to highlight areas where light hits the leaves and trunks. Add some shadows to create depth.
5. Creating the Woodland Path: The woodland path is a key feature in our gouache woodland walk painting. Use shades of brown, ochre, and a hint of green to paint the path winding through the forest. Add texture by using quick, short strokes to mimic the natural look of a forest floor.
6. Final Touches: To finish your painting, add the final touches that make your forest scene pop. This could include small plants, fallen leaves, and additional highlights and shadows. Ensure you step back occasionally to view your work from a distance and make adjustments as needed.
Video Tutorial by Raghad
For those who prefer visual learning, Raghad has created an excellent video tutorial that walks you through the entire process of creating this beautiful green forest gouache painting.
Watching the video will provide you with real-time demonstrations of techniques and tips that are invaluable for mastering this style of painting. Be sure to check out Raghad's video to see the magic unfold step by step.
Creating a forest scene with gouache is not only a rewarding artistic endeavor but also a wonderful way to connect with nature through art.
By following this forest gouache painting tutorial, you'll be able to paint a green forest woodland walk that captures the essence of the natural world. Gather your materials, follow along with Raghad's guidance, and immerse yourself in the tranquil beauty of gouache landscape painting. Happy painting!
We thank Raghad for the images.
Enjoy This Video Tutorial About Paint a Green Forest
Source: Raghad
Did you find this post useful or inspiring? Save THIS PIN to your Art Board on Pinterest! 😊
Discover More Artistic Inspiration