
Creating Landscapes with Alcohol Markers: A Beginner’s Guide

Alcohol markers are a fantastic medium for artists looking to add depth, vibrancy, and a unique touch to their illustrations. Known for their ability to layer and blend smoothly, alcohol markers allow for a wide range of styles and effects.
In this article, we'll explore how to turn a reference photo into a stylized illustrative landscape using alcohol markers, a technique that can help you create bold and colorful designs while capturing the essence of a real scene.
Why Alcohol Markers Are Perfect for Illustrative Landscapes
Alcohol markers are favored by many artists due to their quick-drying properties and smooth application, which make them perfect for creating illustrations with clean lines and seamless color transitions.
These markers are available in a wide range of vibrant colors, and their ability to layer and blend without muddling the colors allows you to achieve both subtle gradients and sharp contrasts, key components for any landscape illustration.
The Versatility of Alcohol Markers
One of the standout features of alcohol markers is their versatility. Whether you’re aiming for a realistic landscape or a stylized interpretation, alcohol markers can accommodate both.
The markers’ ability to create translucent layers enables you to adjust the intensity of your colors and build depth gradually. This makes them ideal for landscape art, where you might want to capture the gradual changes in lighting or emphasize textures like clouds, foliage, and terrain.
Another advantage of alcohol markers is their precision. With the fine tips available, you can create delicate details, making them perfect for depicting fine features such as buildings, trees, and pathways in a landscape scene.
The control and consistency alcohol markers provide make them an excellent choice for artists who enjoy clean lines and sharp edges in their illustrations.
From Reference Photo to Stylized Illustration
Turning a reference photo into a stylized illustration is a rewarding process that allows you to add your own artistic touch to a real-life scene.
Using alcohol markers, you can create a unique interpretation of the landscape, playing with colors, shapes, and lighting to bring your vision to life.
Selecting the Right Reference Photo
The first step in creating a stylized landscape with alcohol markers is selecting a reference photo. Choose a photo that has a strong composition and interesting elements to focus on.
You might want to look for a scene with vibrant colors, contrasting light, and textures that you can exaggerate or simplify in your illustration.
Emphasizing Key Elements in the Landscape
When working from a reference photo, you don’t have to replicate every detail perfectly. Instead, focus on emphasizing key elements of the landscape that will make the illustration unique and striking.
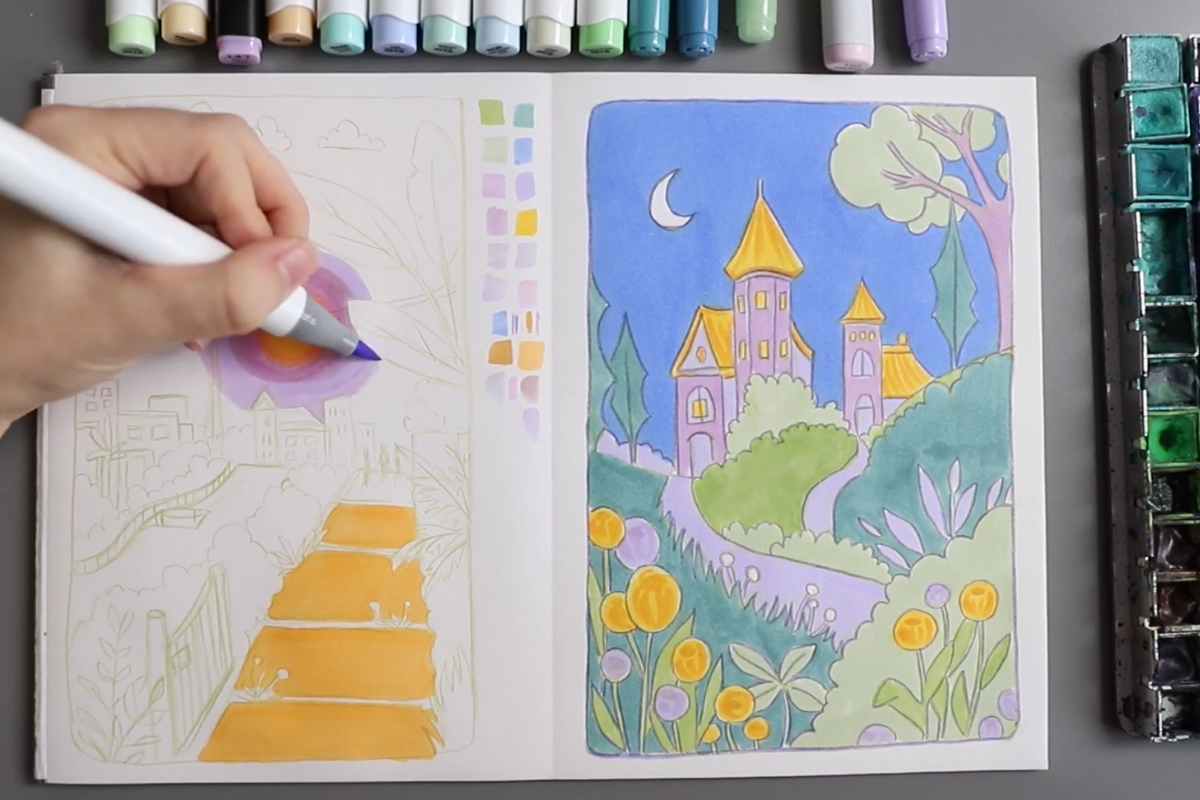
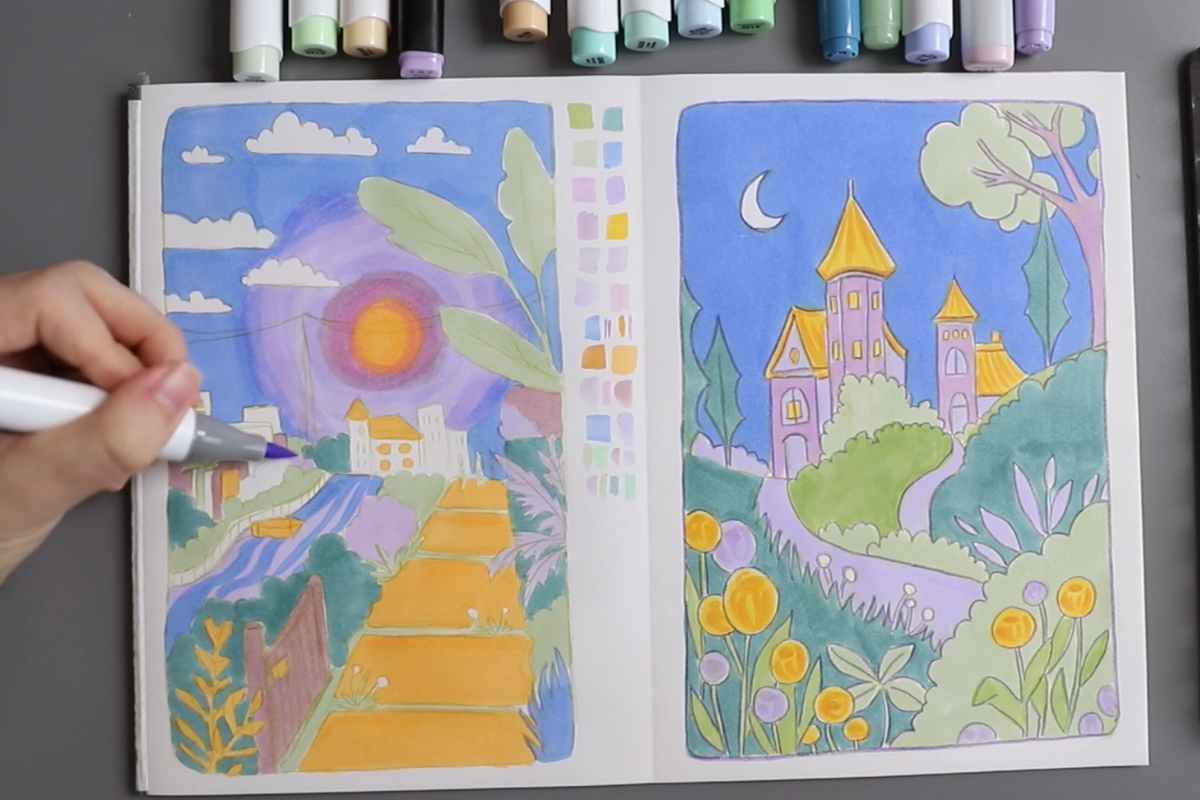
For example, if you're painting a sunset scene, you could exaggerate the colors of the sky, creating a bold gradient of warm hues like oranges, pinks, and purples, while simplifying the background to avoid distraction.
Using alcohol markers, you can also add textures to the landscape, such as the texture of the ground, the movement of water, or the foliage of trees. The beauty of alcohol markers is that you can layer different colors to create a dynamic texture that brings life and dimension to your artwork.
Tips for Using Alcohol Markers to Create Stunning Landscapes
Creating an impressive landscape illustration with alcohol markers requires both patience and creativity. Here are some tips to help you make the most of your markers and achieve stunning results:
1. Work in Layers
Alcohol markers are designed to be layered. Start with lighter shades and build up to darker colors, gradually adding depth. For a smooth gradient, start by applying a light wash of color and then layer darker shades to create depth in areas such as the foreground or shadows.
2. Blend with Care
One of the most powerful features of alcohol markers is their ability to blend. To achieve seamless transitions, use a blending marker or a lighter color to blend the edges between two colors.
For example, when creating a sky, blending the transition from light blue to purple will give your landscape a realistic glow.
3. Focus on Contrast
For a dynamic and eye-catching illustration, focus on creating strong contrast in your work.
Use bright colors in the foreground, such as the sun or buildings, and pair them with darker tones in the background. This helps create a sense of depth and ensures that important elements stand out.
4. Use Fine Details for Precision
Alcohol markers come in a variety of tip sizes, including fine tips for adding detailed elements. Use these fine tips to define small details such as tree branches, rooftops, and streetlines.
Adding these precise elements will enhance the overall structure of the landscape, making it appear more polished.
Creating a Unique Style in Your Illustrations
One of the most exciting aspects of working with alcohol markers is the ability to develop your unique artistic style.
As you become more comfortable with blending and layering, you’ll naturally start to experiment with different techniques and color choices that express your creativity.
While alcohol markers are great for realistic landscapes, they are also fantastic for more abstract or stylized illustrations.
You can play with bold color combinations, geometric shapes, or even exaggerated perspectives to create a personal, imaginative interpretation of a landscape. The sky’s the limit when it comes to how you can make this technique your own.

Final Thoughts
Creating an illustrative landscape with alcohol markers is both an enjoyable and rewarding process. With the right techniques and a bit of practice, you can transform any reference photo into a stunning piece of artwork.
The ability to layer, blend, and add precise details makes alcohol markers an excellent choice for artists looking to bring vibrant landscapes to life.
By embracing your creativity and focusing on key elements of the scene, you’ll soon master this technique and be able to produce professional-quality illustrations.
Let your imagination guide you as you explore the world of alcohol marker landscapes, and don’t forget to use this method as an opportunity to experiment and find your own unique artistic voice.
We thank Visual Mind for the images.
Enjoy The Video Tutorial

Source: Visual Mind
Did you find this post useful or inspiring? Save THIS PIN to your Art Board on Pinterest! 😊

Discover More Artistic Inspiration