
How to Create a Serene Blue Waterfall Scene in Acrylic
Immerse yourself in the calming power of nature with this Blue Misty Waterfall acrylic painting tutorial. This dreamy landscape combines vibrant blues, misty highlights, and flowing water to create a serene and luminous forest scene.
Designed for artists at any skill level, this step-by-step demonstration helps you explore essential techniques while building a tranquil composition full of atmosphere.
A Scene That Invites Peace and Imagination
Why Paint a Misty Waterfall?
Waterfalls symbolize movement, clarity, and the soothing rhythm of nature. By adding a veil of mist and surrounding the scene in cool blue tones, this painting evokes an ethereal stillness that feels almost otherworldly.
The result is both dramatic and relaxing—a perfect piece to practice mood and lighting in your work.
Painting water and mist also allows for exploration in layering, blending, and atmospheric perspective. Each element—from soft sky to bold foreground—teaches you to control depth and focus using brush techniques and color temperature.
Color Palette and Mood
Building with Blues
The soul of this painting lies in its variety of blues. From deep indigo shadows to turquoise glows and powdery sky blues, each tone plays a role in creating light, distance, and drama.
Mixing shades carefully ensures your mist looks soft, not flat, and your water glistens without overwhelming the eye.
Blues also create a strong emotional tone. This piece feels calm, quiet, and cool—a refreshing escape from daily chaos. By working in a mostly monochromatic palette, you’ll also learn how to create contrast and detail using just a few hues.
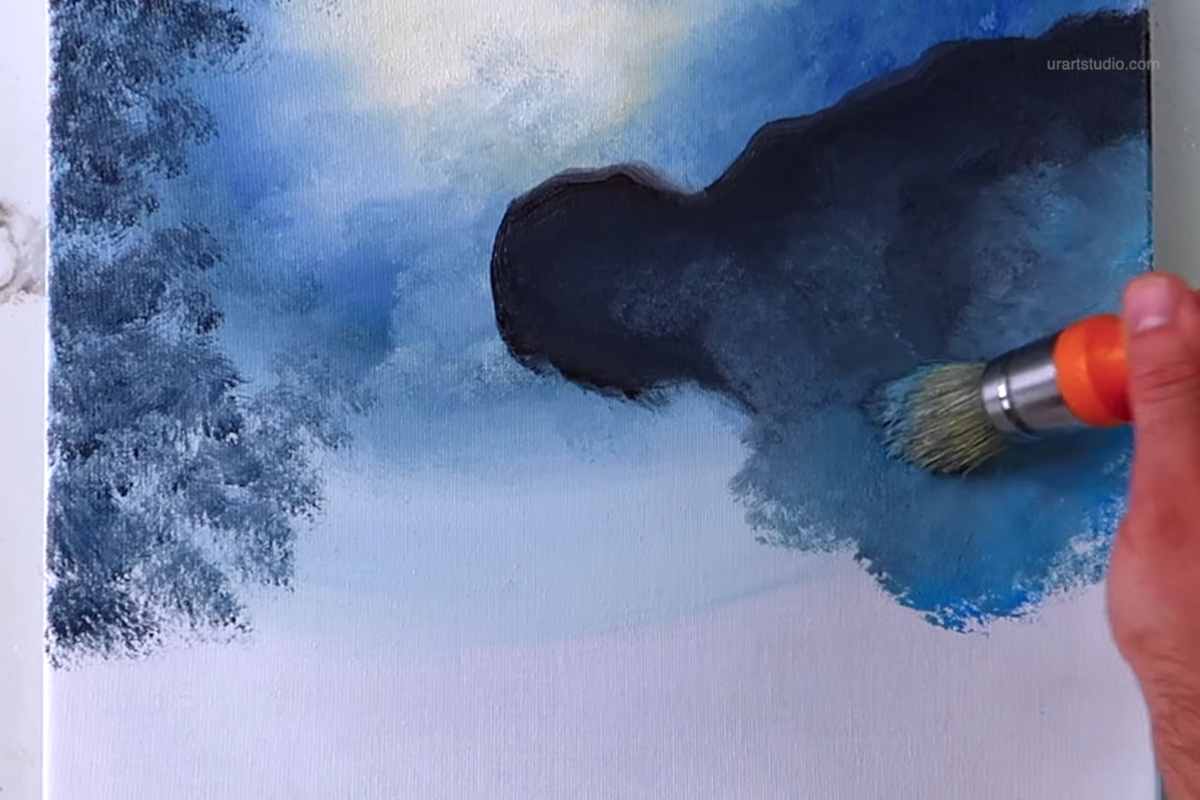
Subtle Highlights and Mist
The mist in this painting is what gives it its dreamlike quality. Created with dry brushing and gentle scumbling, it floats between layers of trees and water, enhancing the depth and softness of the scene.
Strategic white and pale blue accents make the waterfall shine, suggesting movement and light even in a still image.
Elements of the Composition
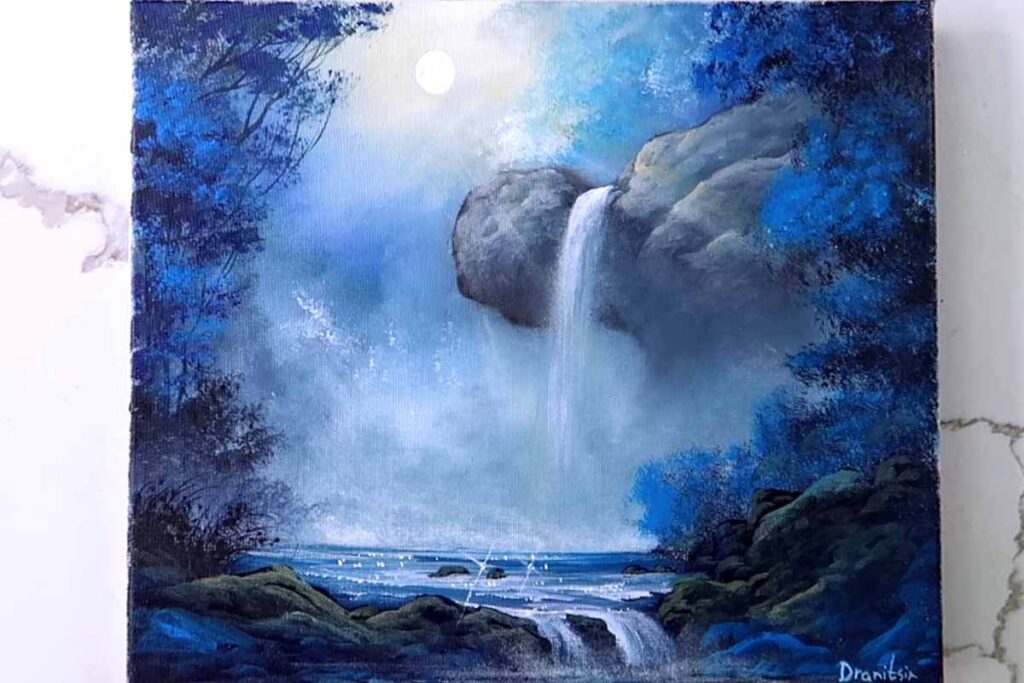
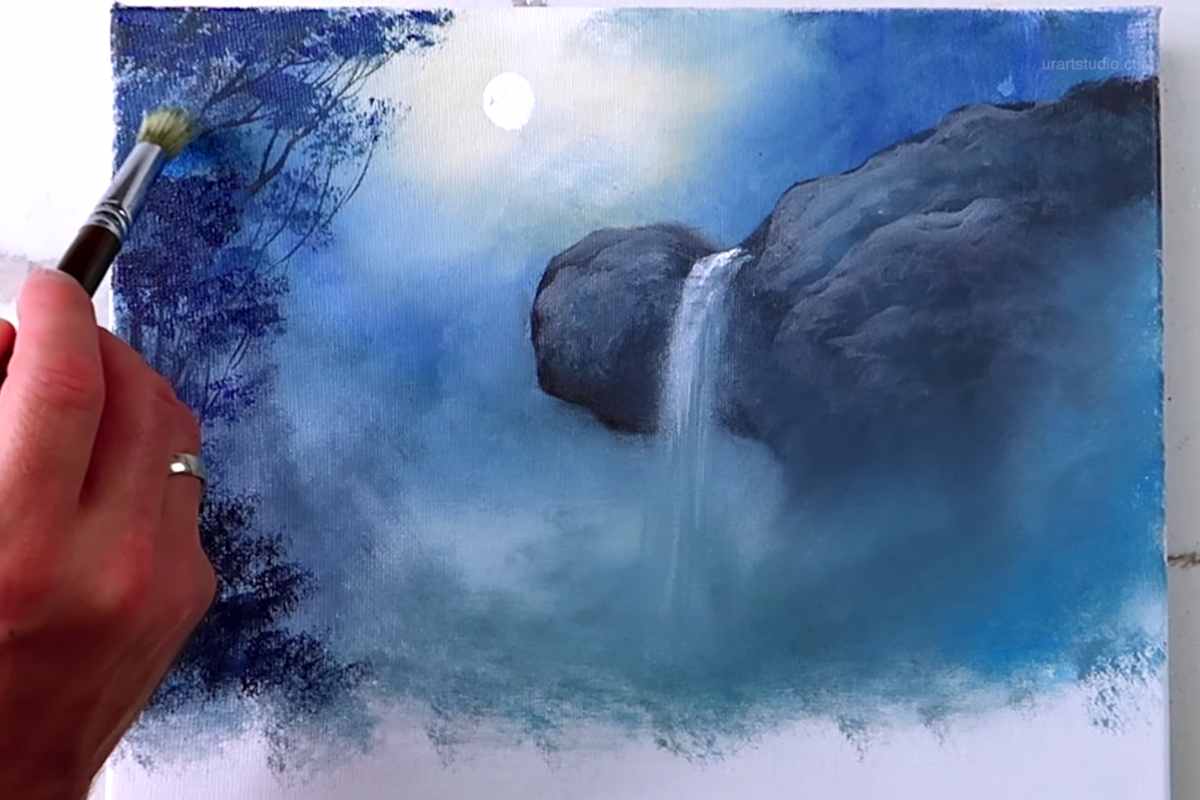
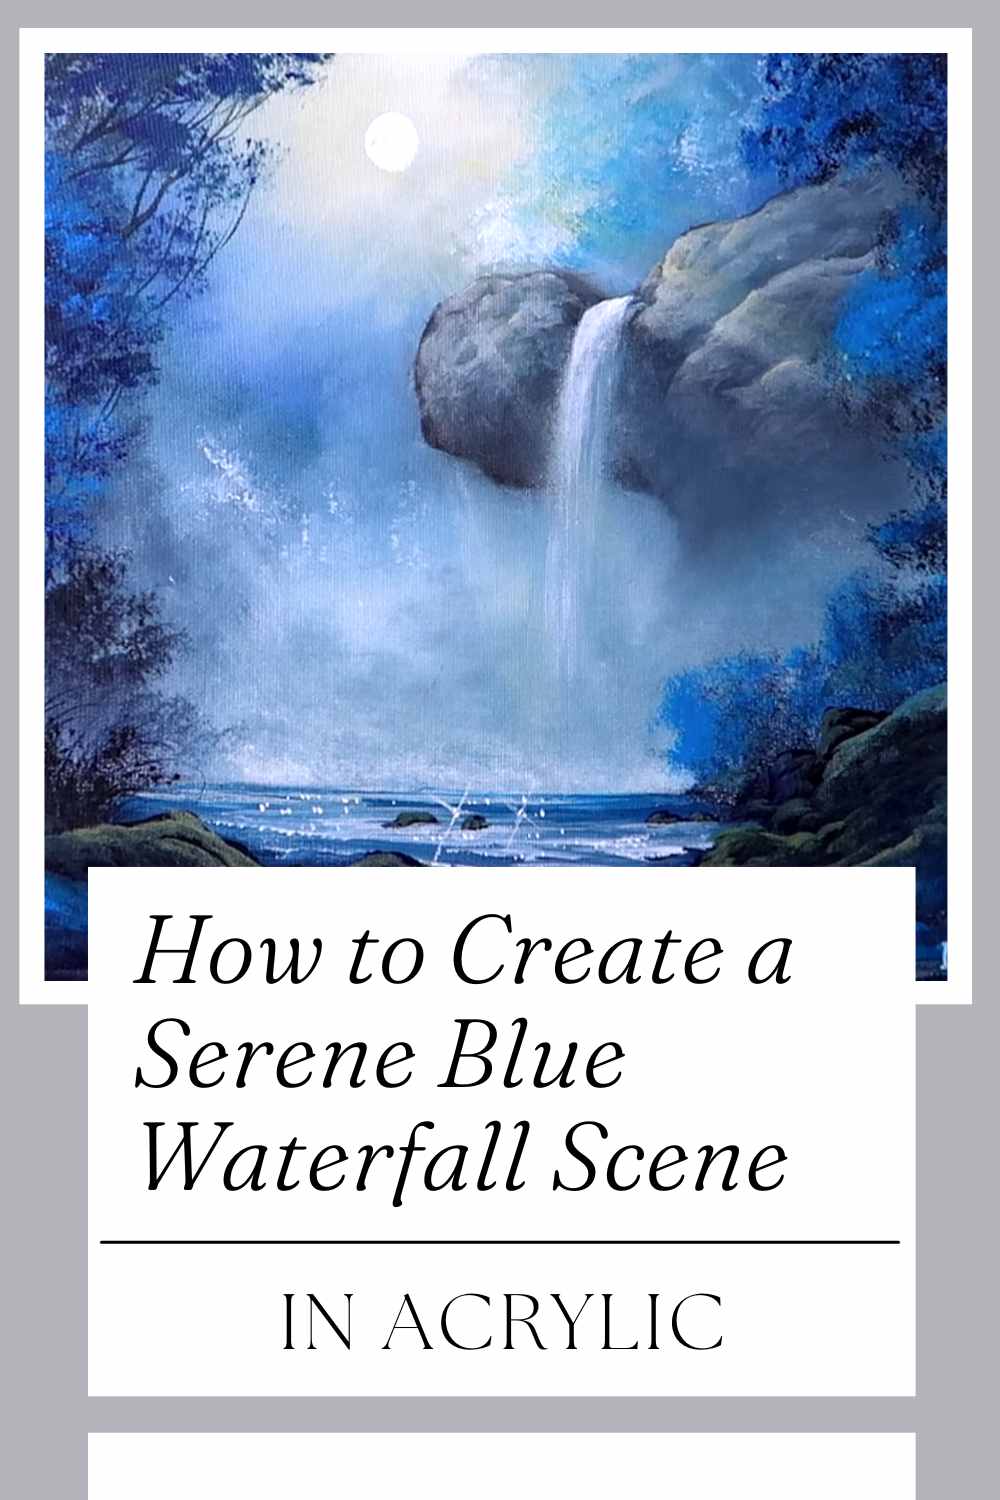
The Waterfall as Focal Point
The waterfall is the heart of this painting. Cascading from the top of a cliff, it draws the eye straight down the center of the canvas and spills gently into the lake below.
The vertical motion contrasts with the horizontal flow of the water and rocks, adding balance and energy to the layout.
Its luminous quality comes from careful layering of light over dark, giving it transparency and dimension. Even though it’s a central feature, it doesn’t dominate the composition—instead, it complements the surrounding forest and sky.
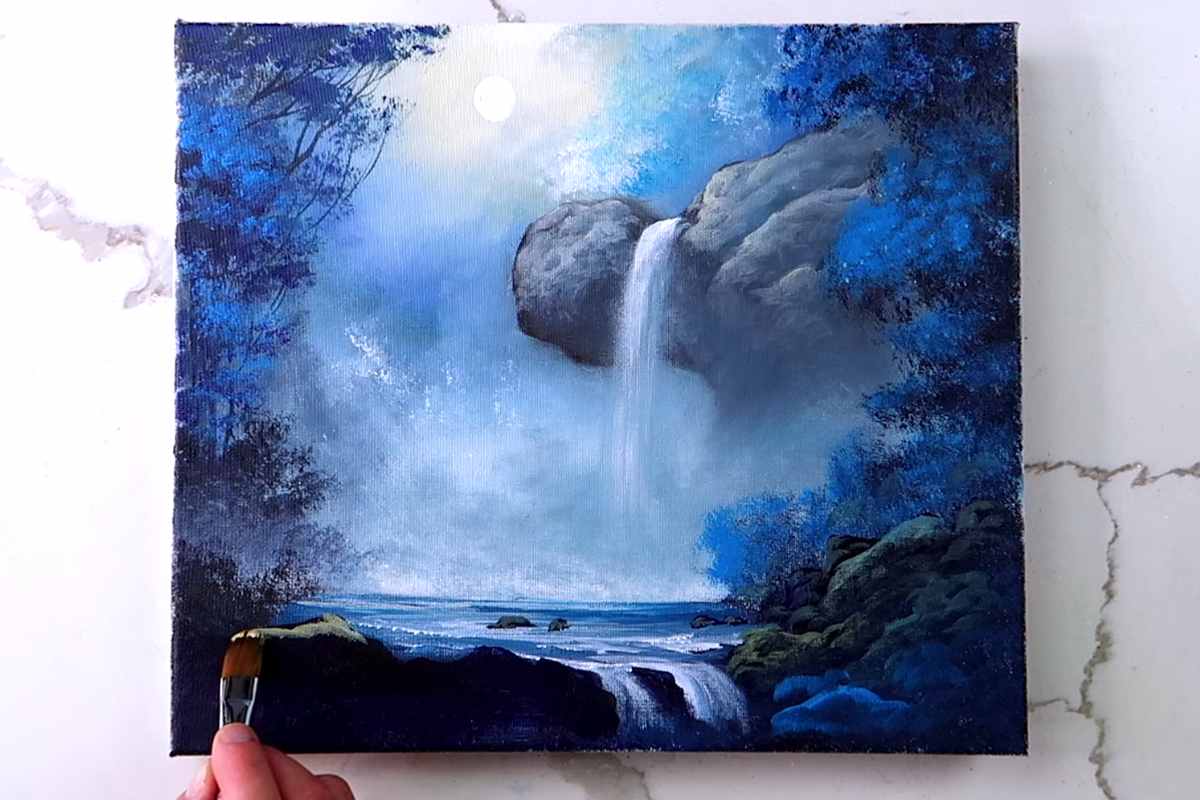
Trees, Rocks, and Foreground Texture
Framing the scene are silhouetted trees and mossy rocks, painted in darker shades to provide contrast. These shapes help lead the viewer into the space and offer a sense of scale. Their loose, natural textures make them fun to paint while adding realism.
Foreground rocks and foliage use deeper blues and greens to anchor the piece and create a strong sense of perspective. This contrast between soft mist and textured elements gives the composition richness and balance.
Techniques You'll Explore
- Blending gradients for sky and water
- Dry brushing to build misty layers
- Using white sparingly for highlights and glow
- Layering dark to light for volume and depth
- Creating motion in falling water with directional strokes
Whether you're practicing your blending, improving brush control, or simply relaxing into the process, these techniques offer a lot of creative flexibility.
Final Thoughts
This Blue Misty Waterfall painting is more than just a tutorial—it's a chance to step into a peaceful world and bring it to life through color and brushwork.
With soft atmospheric effects, bold color harmony, and flowing forms, this artwork is both calming to look at and satisfying to create.
Let the flowing water and mist guide your hand, and enjoy how every brushstroke adds to the serene atmosphere. Whether it hangs on a wall or stays in your sketchbook, this scene will reflect not just nature, but your growing skill and personal style.
We thank URARTSTUDIO for the images.
Enjoy The Video Tutorial

Source: URARTSTUDIO
Did you find this post useful or inspiring? Save THIS PIN to your Art Board on Pinterest! 😊
Discover More Artistic Inspiration