
Rose Flower Acrylic Painting: Light & Shadow
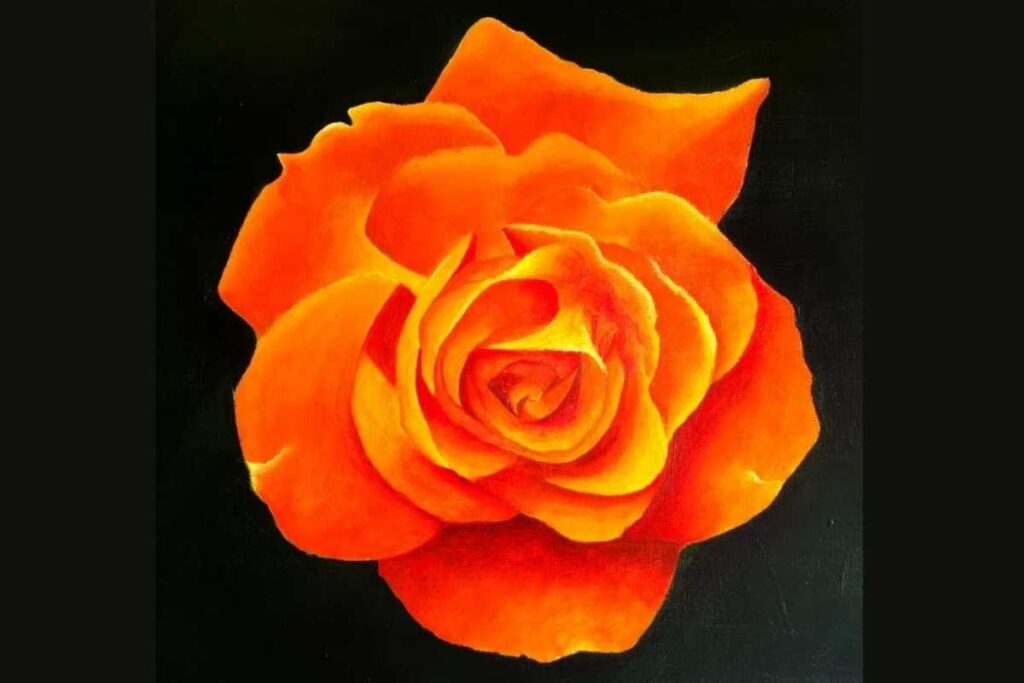
Ready to master a rose flower acrylic painting that actually looks alive? This video breaks down form, light, and edges so your petals read as velvet rather than plastic.
It’s a clear, modern approach to rose painting acrylic that focuses on believable values, saturated color, and confident brushwork for gallery-ready results.
Why This Rose Study Works
A strong value map is the secret to any convincing acrylic painting rose. By separating shadows, midtones, and highlights early, you’ll avoid muddy petals and keep the bloom luminous from the first block-in.
The tutorial emphasizes clean shapes and soft-to-firm edge shifts—the heart of Painting Realistic Flowers.
Because the composition features a single focal bloom, your decisions stay simple: one light source, a supportive background, and a few crisp accents.
That clarity makes this an ideal first pass at Rose Art Painting without getting lost in detail.
Color, Brushes & Surface
Choose a limited warm–cool palette: a cool red for shadow, a warmer red for light, a touch of yellow for glow, and a cool blue to quiet the deepest folds.
Synthetic filberts help draw petal arcs cleanly; a soft round lays down highlights. On a toned panel, reds pop fast—especially useful when painting a rose acrylic alla prima.
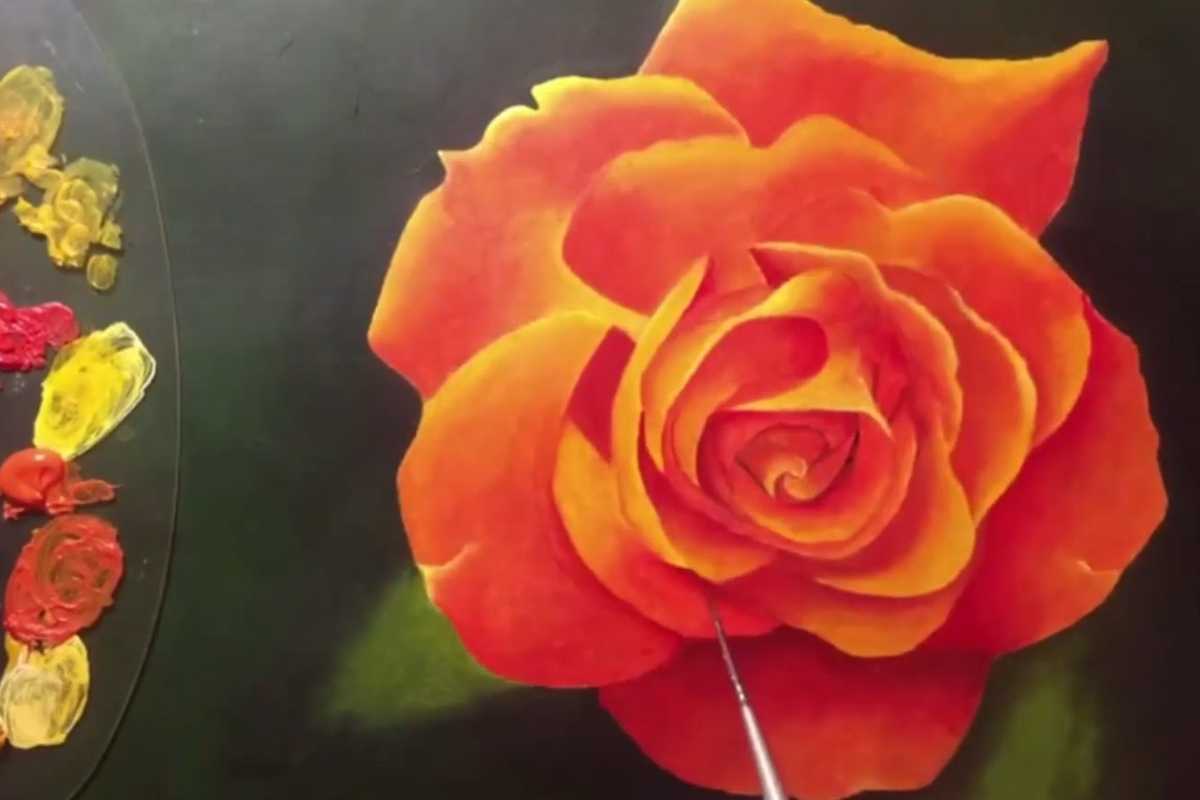
Glazing is restrained but powerful. Thin, transparent passes after the block-in build depth without chalking. This balance is what turns a study into a confident Red Rose Painting.
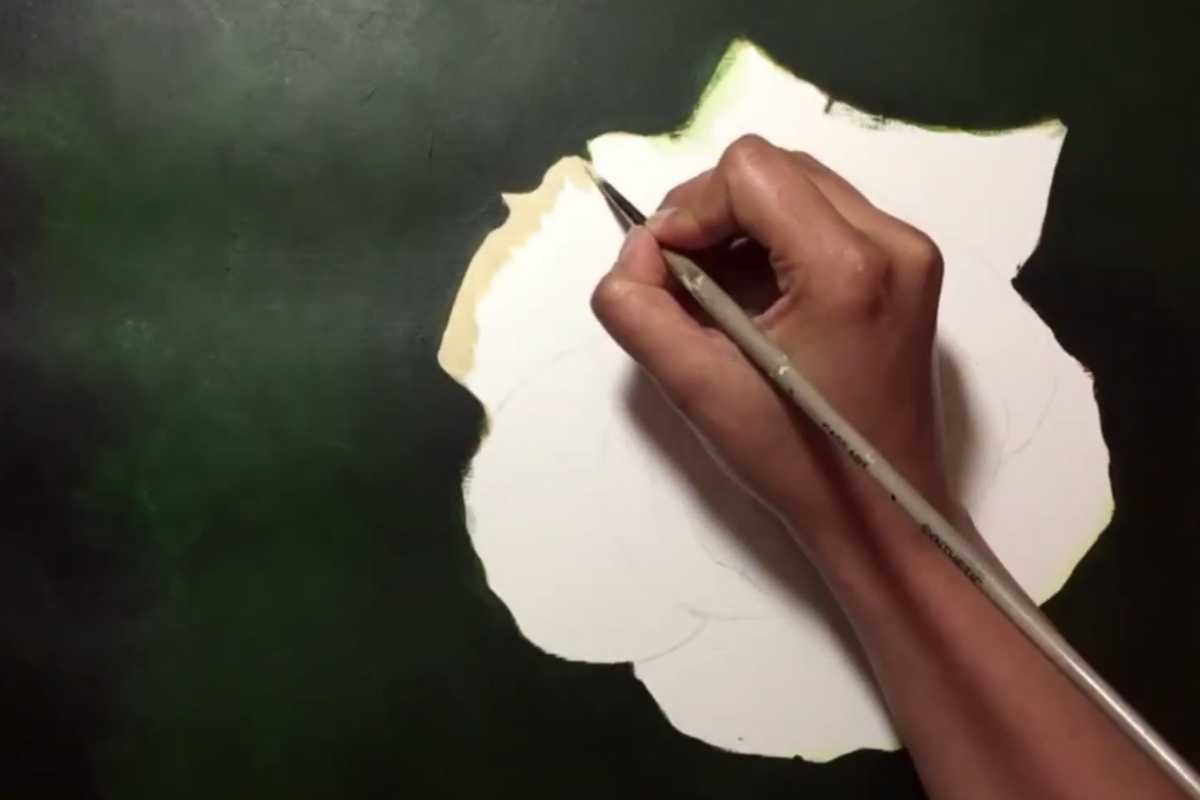
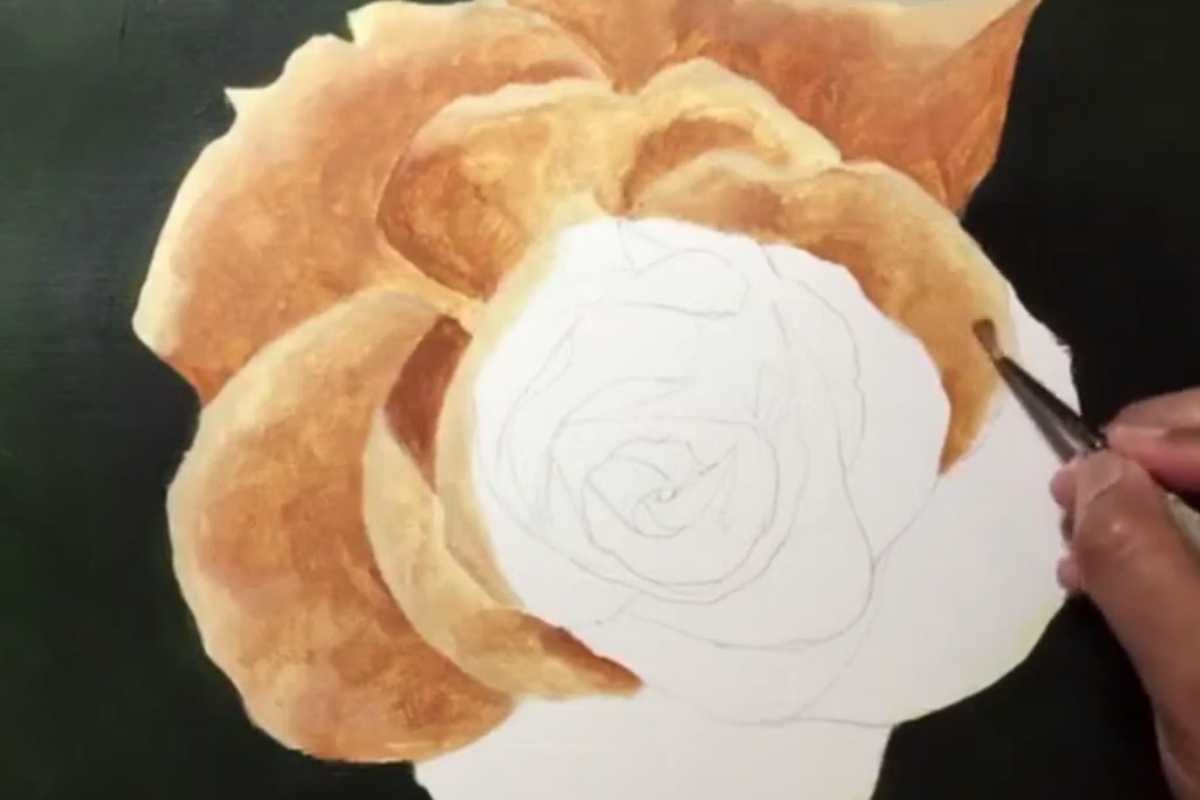
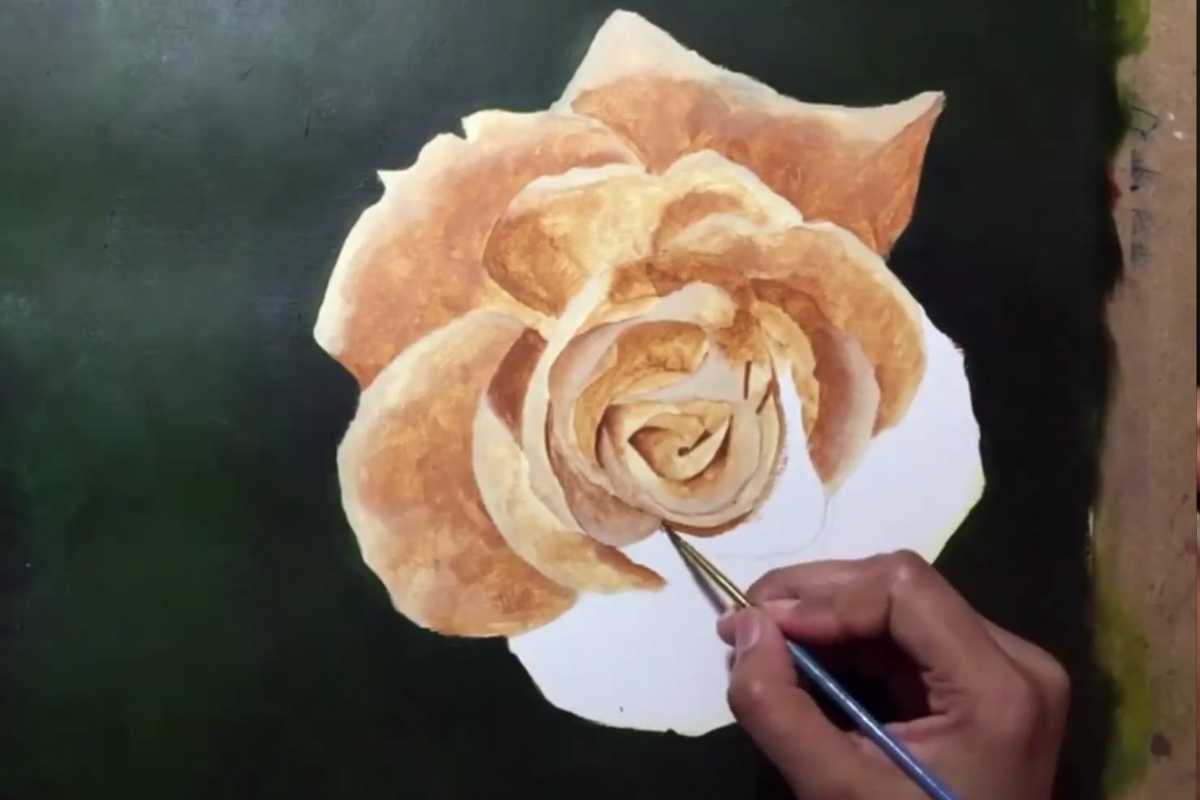
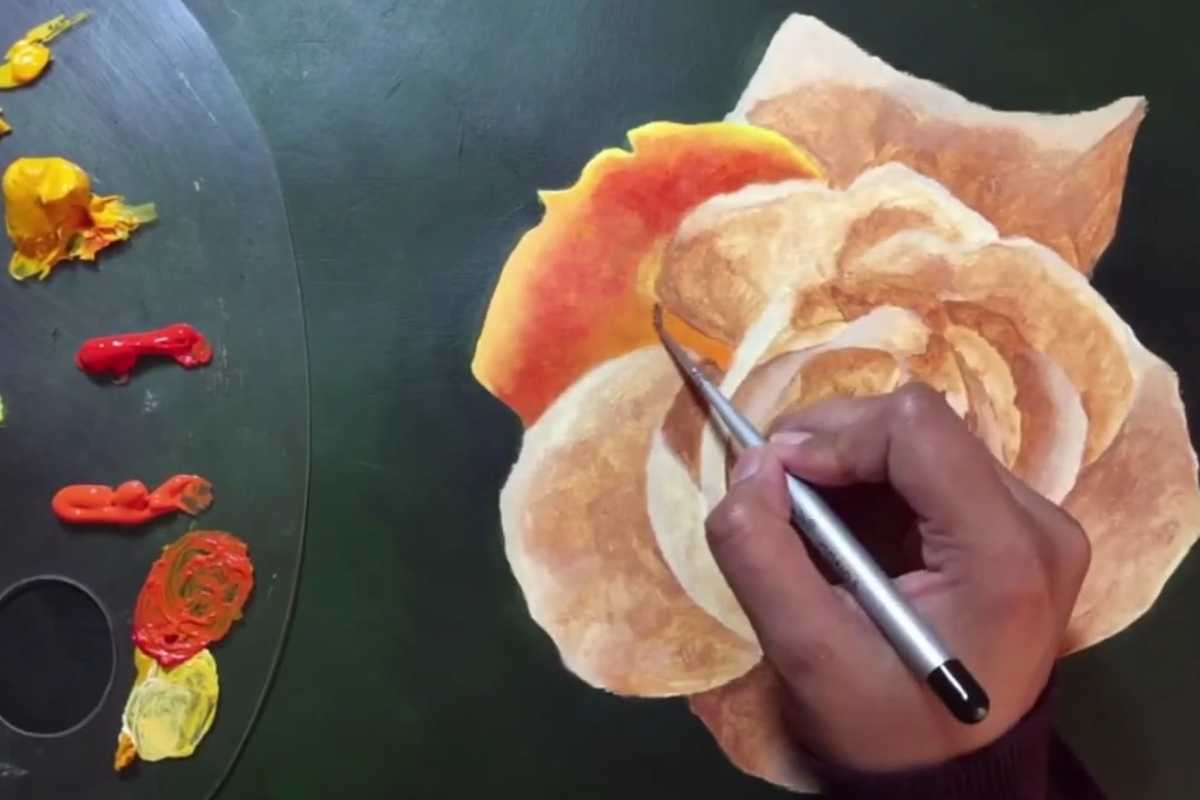
From Block-In to Bloom
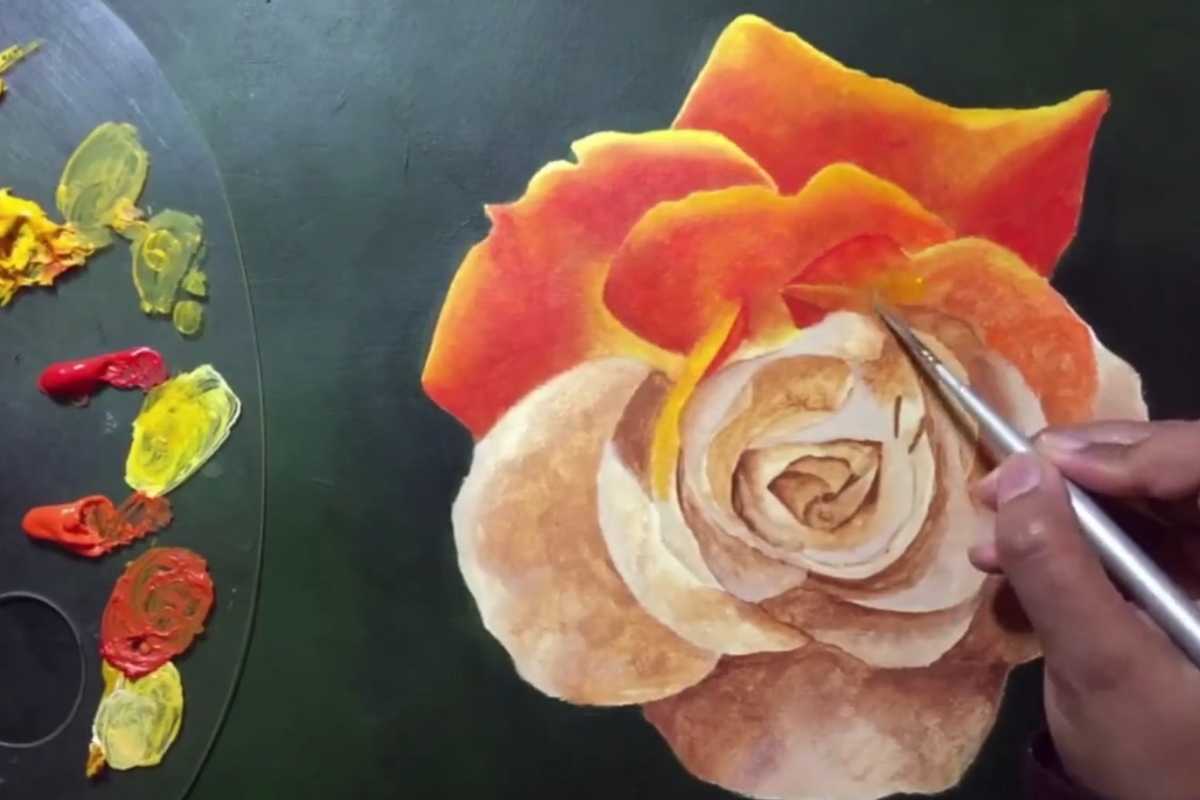
Block-In: Start with the silhouette and biggest shadow masses. Think in simple geometry rather than petals. This keeps your rose acrylic painting crisp and readable at a distance.
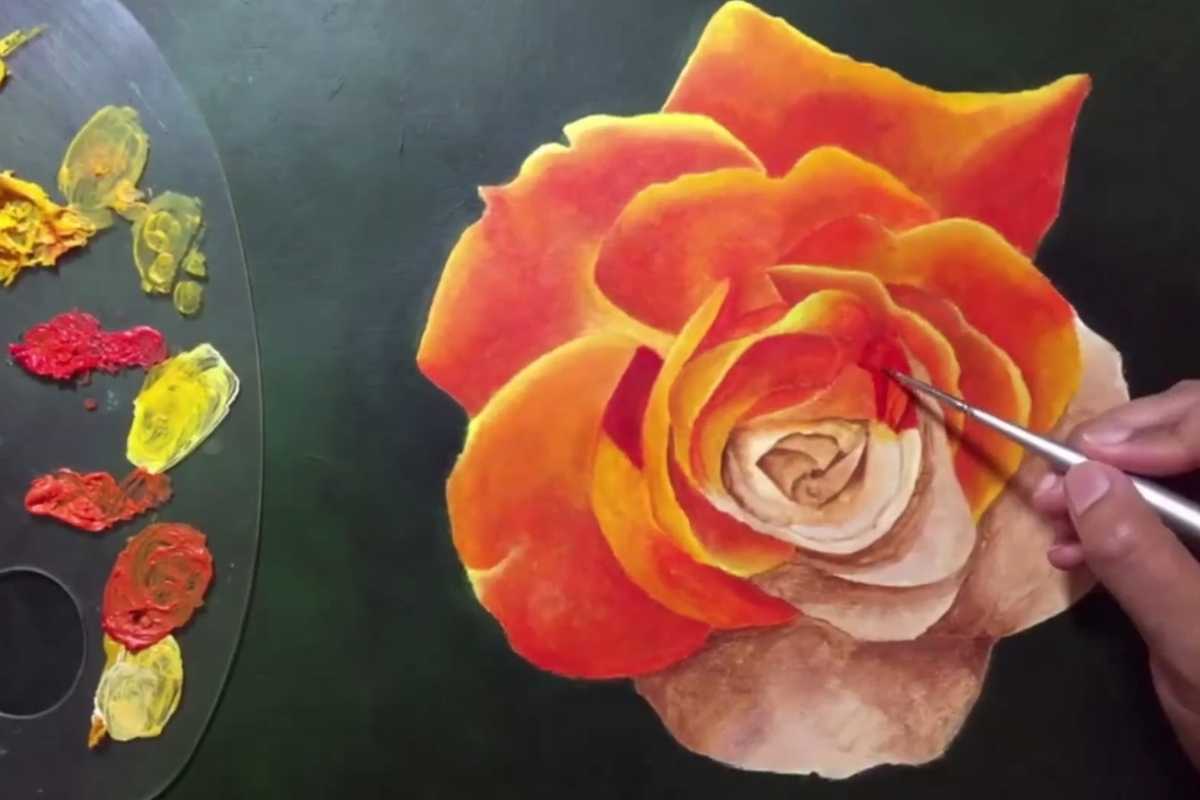
Turn the Form: Bridge from shadow to light with juicy midtones. Reserve the brightest strokes for top planes that face the light. A few controlled accents sell the petal’s satin sheen—a hallmark of any strong Rose Flower Painting.
Background & Leaves: Subdue the background with neutralized color so the bloom leads. A couple of cool green notes near the focal edge create color contrast without stealing attention.
Common Pitfalls & Fixes
Petals look flat? Re-establish the shadow core, then soften transitions outward. The smooth gradient is essential in a successful Rose Canvas Painting.
Colors feel chalky? Glaze with a transparent red or neutral to unify layers. Keep highlights small and decisive; too many will dilute the center of interest.
Who This Is For
If you’re collecting acrylic realistic painting ideas, this demo is a perfect anchor project. It suits ambitious beginners and intermediate painters who want to translate drawing accuracy into paint.
You’ll come away with a repeatable process you can reuse for other florals.
Prefer structured instruction? The video functions like a compact Rose Painting Tutorial—watch once for flow, then paint along with pauses to check shapes and edges.
Apply the Method to Other Blooms
Once this piece clicks, expand your set: blush roses, yellow roses, and buds at different stages. The same workflow supports any rose acrylic painting tutorial you try next and scales up to bouquets.
Experiment with backgrounds—from moody charcoal to airy neutrals—to build a versatile portfolio of painting ideas realistic without relearning the fundamentals each time.
Key Takeaways & Next Steps
Great florals rely on value design, edge control, and disciplined color. Keep the number of highlights low, protect your shadow family, and think in planes rather than outlines.
If you ever wondered How To Paint A Rose with believable volume, these habits make the difference.
Use the demo as a roadmap you can revisit whenever you want to refresh your process or prep for a larger commission or show.
We thank Canvas Whispererr for the images.
Watch the Tutorial

Source: Canvas Whispererr
Discover More Artistic Inspiration